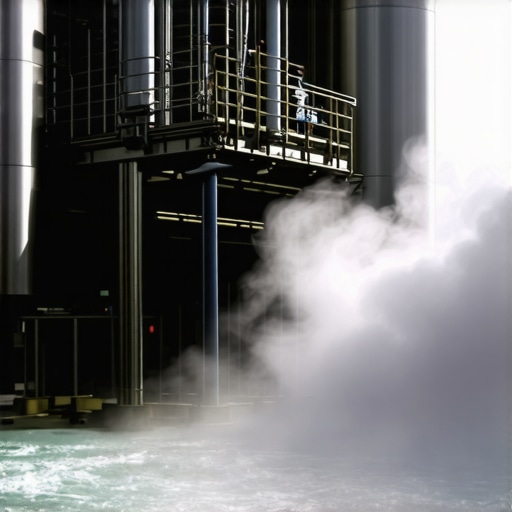
I still remember the frustrating morning when I fired up my power washer, only to realize the stubborn grease stains on my driveway wouldn’t Budge. I cranked up the pressure, expecting that more PSI (pounds per square inch) would do the trick. But instead, I was left with streaks, damage, and a sinking feeling I was doing it all wrong. That lightbulb moment changed my entire approach to power washing—and it’s a lesson I wish I had learned sooner.
Why Relying on PSI Alone Can Sabotage Your Cleaning Success
For years, I believed that the higher the PSI, the better the results. It seemed logical—more pressure should power through grease and grime, right? But I quickly discovered that this mindset is just part of the puzzle. When you focus solely on PSI, you risk damaging surfaces, wasting time, and failing to get that pristine look you desire for your property. The truth is that effective power washing requires a more nuanced understanding of technique, equipment, and surface compatibility.
Are You Falling into the Same Trap?
Early on, I made the mistake of thinking that cranking up the PSI would magically remove tough grease and dirt. I didn’t realize that using the wrong nozzle, diluting cleaning solutions improperly, or neglecting surface pressure recommendations could actually make things worse. This oversight started to damage my driveway and siding, and I knew I had to change my approach. For a deeper dive into proven techniques, check out power wash techniques that deliver spotless results. Learning these strategies has saved me time, money, and frustration—and I want the same for you.
So, if you’re tired of throwing high PSI at every stubborn stain and ending up with subpar results—or worse, surface damage—you’re in the right place. In the sections ahead, we’ll explore the real keys to effective power washing in 2026, beyond just cranking up the pressure. Ready to get started? Let’s do this!
Prepare Your Equipment Carefully
Start by inspecting your power washer to ensure it’s clean and in good working condition. Attach the correct nozzle—generally a 25-degree nozzle for most surfaces—and double-check hose connections to prevent leaks. For tougher stains, consider using a turbo or variable nozzle, which can offer more control and power. Remember, using top-quality equipment makes a significant difference in cleaning efficiency.
Select the Right Cleaning Solution
Not all stains respond to water pressure alone, especially grease or oil. Apply a specialized cleaning solution suited to the surface—degreasers for concrete, or gentle detergents for siding. Let the solution sit for 5–10 minutes, but avoid letting it dry out, which can cause streaks or residues. I once experimented with different solutions on my driveway, and mixing a biodegradable degreaser diluted with water yielded the best results without damaging the concrete surface.
Use Technique Over Raw Power
Instead of aiming solely for high PSI, focus on proper technique. Hold the wand at a 45-degree angle to the surface and keep it moving in consistent, overlapping strokes—like painting a wall. Don’t approach the surface directly; maintain a safe distance—about 12–18 inches—to prevent surface damage. During my first attempt, I used high PSI and blasted the surface directly, causing streaks and erosion. Changing my approach to steady, controlled passes transformed the outcome. For expert guidance on technique, visit these proven methods.
Adjust Water Pressure Strategically
Set the pressure level according to the surface. Use lower pressure for delicate areas like siding or wood decks—the kind that tend to peel or splinter. For concrete or brick, increase pressure but stay within manufacturer-recommended limits. I once tried to clean my wooden deck with maximum PSI, which shredded the wood fibers. Lowering the pressure and using a wider nozzle improved results without damaging the surface. Remember, adjusting pressure is key to protecting your surfaces while cleaning thoroughly.
Practice Proper Nozzle Techniques
Switch nozzles based on the surface, starting with wide spray tips for general cleaning and switching to narrower tips for stubborn stains. Keep the wand moving—never linger in one spot—to avoid etching or streaking. I initially stuck with a standard nozzle and wondered why my driveway looked uneven. Transitioning to a nozzle with a 15-degree spray and moving smoothly across the surface made a noticeable difference. For tips on choosing the best nozzles, check out top equipment strategies.
Rinse and Finalize Properly
Once you’ve sprayed the entire area, switch to a wide, low-pressure setting to rinse away cleaning solutions and dislodged grime. Rinsing thoroughly prevents soap residues that can attract dirt or cause streaks. Personally, I learned this lesson when I left soap residue on my siding, leading to streaky appearances. Rinsing from the top down ensures all debris and cleaner are washed away, revealing a clean surface. For more detailed rinsing techniques, see expert tips on maximizing results.
While it’s common to think that cranking up the PSI on your power washer is the key to a spotless surface, this belief often leads to mistakes that damage your property and waste resources. In reality, many enthusiasts overlook the subtle intricacies that distinguish a professional power wash from a novice attempt. One prevalent misconception is that higher pressure always equates to better cleaning—yet, experts know that surface type, nozzle selection, and proper technique hold the real power. For example, using excessive PSI on delicate siding can strip paint or cause structural damage. To truly master power washing, understanding these nuances is essential, and exploring proven strategies can help you avoid costly errors. Check out these trusted techniques for reliable results.
Are You Overlooking the Surface’s Tolerance Level?
A common trap is to assume all surfaces respond equally to pressure. Concrete and brick tolerate higher PSI, but wood and vinyl siding require a gentle touch, or risk warping and erosion. The myth that more pressure equals cleaner results often leads to surface damage, which can be costly to repair. According to industry experts, adjusting pressure based on surface material and condition is key to avoiding mistakes and achieving the best outcome this detailed guide emphasizes the importance of strategic pressure adjustments over brute force.
Another overlooked aspect is nozzle type. A narrow spray tip might seem effective for stubborn stains, but it can also etch delicate surfaces if not used correctly. Proper nozzle selection, combined with correct distance and technique, amplifies cleaning efficiency without risking surface integrity.
Furthermore, many users believe that increasing cleaning solution strength will compensate for lower pressure, but this often backfires by leaving residues or causing streaks. The optimal approach combines appropriate pressure settings with targeted cleaning agents, enhancing the overall quality of the job. For advanced users, implementing these refined methods can significantly elevate results, saving time and money. For comprehensive tips, see these expert hacks.
Remember, rushing to increase PSI in hopes of immediate results is a common trap; instead, focus on mastering the nuances of equipment, surface compatibility, and technique. Doing so will ensure your power washing efforts are both effective and safe, an essential skill that distinguishes amateurs from pros. Have you ever fallen into this trap? Let me know in the comments.
Maintaining your power washer over time is crucial to ensure consistent performance and extend its lifespan. Investing in quality tools and adopting a routine maintenance schedule will save you money and frustration in the long run. One of the most effective methods I use personally is regularly inspecting and replacing worn-out hoses and nozzles. Using a high-pressure hose like the top-quality pressure hose prevents leaks and bursts, which are common issues with cheaper alternatives. Additionally, I recommend keeping a set of specialized cleaning tools, such as a turbo nozzle for stubborn stains and a adjustable axial flow nozzle for delicate surfaces, to optimize your cleaning without risking surface damage.
Proper maintenance extends beyond just replacing parts. Regularly flushing the pump with clean water after each use prevents corrosion, and applying a few drops of pump oil—preferably compatible with your model—every 50 hours of operation keeps internal components lubed and functioning smoothly. I follow the advice of industry professionals, like the experts at power washer battery care specialists, to ensure my equipment runs reliably year-round.
Another vital aspect is storing your unit correctly. I always drain all water from hoses and nozzles before winter, as remaining water can freeze and damage internal parts. Using a dedicated pump protector spray during off-seasons can also prevent rust and buildup. For comprehensive tips on maintenance routines, check out these expert-approved methods.
Looking ahead, the trend toward automation and smart maintenance tools is promising. Companies are developing sensors that monitor pressure and detect leaks in real-time, alerting users via smartphone apps. This innovation will make maintenance even more straightforward and reliable, pushing the industry toward fully automated health checks for power washers. I predict that in the next few years, integrating IoT devices with power washing equipment will become standard practice for professional and DIY users alike. Try implementing a routine of inspecting hoses and replacing nozzles periodically to keep your power washer running at its best, and consider embracing smart maintenance solutions as they become available.
How do I maintain my power washer over time?
Establishing a regular maintenance schedule is key. This includes inspecting hoses and nozzles, flushing the pump after each use, applying pump oil, and storing the unit properly during cold months. Utilizing specialized tools like adjustable nozzles and pressure gauges tailored to your model can help ensure optimal performance. For additional insights, exploring trusted resources and expert advice can guide you in extending the lifespan of your equipment and maintaining peak performance. Don’t forget—regular care keeps your power washer efficient, safe, and ready for any cleaning challenge. Want to maximize your results? Try replacing your nozzle with a high-quality adjustable tip this weekend and see the difference it makes.
Uncover the Hidden Lessons That Changed My Power Washing Game
- One of the most eye-opening realizations was that surface safety outweighs brute force. Using less pressure on delicate surfaces prevented costly repairs and still achieved a spotless look. I’ve learned that patience and technique triumph over high PSI.
- Experimenting with different nozzle angles taught me that precision matters. Switching from a 25-degree to a 15-degree nozzle for stubborn stains made a world of difference, highlighting the importance of the right tool for the task.
- Regular maintenance isn’t just about prolonging equipment life—it’s about consistent results. I discovered that a simple routine of flushing and inspecting can prevent unexpected breakdowns during crucial cleaning jobs.
- The biggest lightbulb moment was understanding surface-specific pressure tactics. Concrete tolerates high PSI, but siding prefers a gentle touch. Tailoring your approach ensures efficiency without damage.
Following a Curated Path to Cleaning Excellence
- Power wash techniques that deliver spotless results have transformed my approach, emphasizing technique over raw power.
- Investing in quality gear like top-tier equipment pays off in efficiency and surface safety.
- I’ve found that mastering nozzle selection through pro tips on nozzle use prevents streaks and etching.
- Understanding effective maintenance routines via trusted industry advice keeps my equipment ready for any challenge.
Your Power Wash Future Starts Today
Embarking on a power washing journey doesn’t mean you need perfection from the start. With the right mindset, tools, and techniques, your surfaces will thank you for the careful approach. Remember, mastery is a continuous process—each project teaches a new lesson. So, seize the opportunity to learn, adapt, and elevate your skills. Your surfaces are waiting for that clean, crisp look—trust yourself to make it happen. What has been your biggest challenge in power washing, and how did you overcome it? Share your experiences below!.
Reading this post really resonated with me, especially the part about how surface safety should always take precedence over just cranking up the pressure. I once made a similar mistake when I used maximum PSI on my vinyl siding, only to end up with scratched and warped sections. Since then, I’ve learned to pay closer attention to surface-specific pressure recommendations and nozzle types. It’s amazing how much more effective and safer your cleaning becomes when you combine proper technique with the right equipment. I’ve also started experimenting with different nozzle angles and cleaning solutions, which has significantly improved my results.
One question I have is, how do you determine the optimal pressure setting for delicate surfaces without risking damage? Are there specific tools or guidelines that help in calibrating these settings accurately for different materials? Would love to hear others’ tips on balancing pressure and technique for the best results.