Ever felt that sting of frustration after spending hours pressure washing only to see the grime stubbornly sticking around? I’ve been there. There was a moment early in my journey when I blasted away with my new pressure washer, only to realize I had missed crucial spots or used the wrong technique. That lightbulb moment hit hard — I was doing it all wrong, and the results suffered. But here’s the thing: mastering the art of power washing isn’t about luck; it’s about knowing the right techniques and equipment to get those lasting, trustworthy results.
Why Proper Power Washing Technique Matters More Than Ever
In 2024, the demand for quality outdoor cleaning has skyrocketed. People want their homes to look pristine, and they’re willing to pay for results that last. But many professionals and DIY enthusiasts overlook the importance of proper technique, leading to uneven cleaning, surface damage, or short-lived results. Trust me, I’ve made this mistake early on — rushing into a job without understanding the nuances of effective power washing. That’s why I now emphasize proven methods, backed by expert insights and top-tier equipment, to ensure every job stands out for its durability and quality.
For those ready to elevate their power washing game, I’ll walk you through the core principles that have transformed my results. And if you’re skeptical—thinking, “Is this really worth the effort?”—know that the right approach can save you time, money, and frustration in the long run. Plus, it’s about creating trust with clients or neighbors, knowing you deliver consistent, professional-grade outcomes. Want to see what makes a difference? Check out this guide for detailed strategies that will boost your results in 2024.
Are Power Washing Techniques Really That Critical?
I used to think a high-pressure spray was enough. Turns out, I was turning surfaces into Swiss cheese with my overzealous approach. Early on, I ignored the importance of correct nozzle selection and proper spray angles, which led to surface damage and incomplete cleaning. It was a costly mistake that I learned from—trust me, it’s common but entirely avoidable. Learning the ins and outs of effective power washing, including equipment choices and technique, is what separates amateurs from pros. For more insights, you might want to explore effective equipment strategies that complement your technique for stunning results.
So, are you facing struggles with inconsistent cleaning or surface damage? If yes, don’t worry — you’re not alone. The good news is that with the right knowledge, you can turn your power washing into a reliable, lasting-cleaning method. Ready to learn the proven techniques? Let’s dive into the core strategies that will make your results trustworthy and long-lasting in 2024.
Choose the Right Nozzle and Pressure Settings
When I first started, I thought all nozzles were the same—big mistake. I grabbed a high-pressure nozzle and blasted away, only to realize I was damaging the surface. The key is selecting a nozzle that matches the cleaning task. For delicate surfaces like wood or siding, a 25-degree nozzle at lower pressure works best. For tougher grime on concrete, a zero-degree nozzle at higher pressure might be needed, but only with caution. Always start with a wider spray angle and lower pressure, then gradually increase as needed. This approach prevents damage and ensures thorough cleaning without overdoing it.
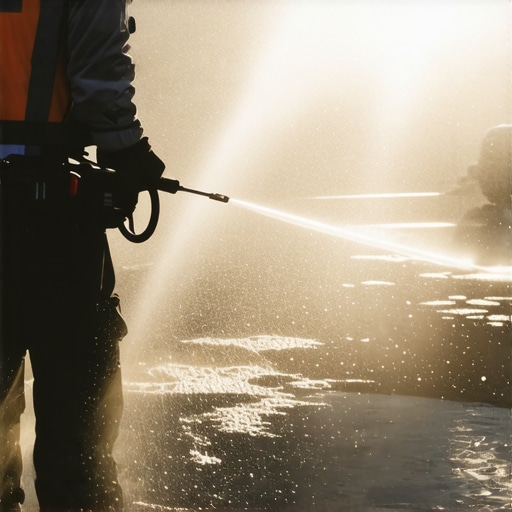
Master the Correct Spray Angle and Distance
My breakthrough came when I learned to control my spray angle and distance. I once tried to clean a deck without paying attention to how close I was—result: streaks and splintered wood. Instead, I kept the nozzle about 12 inches from the surface, angling the spray at roughly 45 degrees. Think of it like watering a plant gently; you want enough pressure to clean but not so much that you damage the surface. Moving the wand in smooth, overlapping motions ensures even coverage and prevents streaks. Practice this technique on a scrap piece first to find the sweet spot for each surface.
Use Proper Technique for Different Surfaces
Different surfaces require different approaches. For vinyl siding, use a gentle spray at a distance to prevent etching. For concrete, use a more direct, aggressive spray but avoid holding the nozzle in one spot for too long, which could erode the surface. I learned this by experimenting on an old patio; holding the nozzle too long in one spot caused pitting. Instead, I kept moving steadily, overlapping each pass. This technique ensures you remove grime effectively without creating new problems. For delicate surfaces like painted wood, always test in an inconspicuous area first to avoid peeling paint or gouging.
Apply Cleaning Solutions Smartly
Sometimes, pressure alone isn’t enough. I remember battling stubborn stains on a driveway; increasing pressure only made the stains worse. Instead, I applied a biodegradable cleaner first, letting it sit for 10 minutes. Then, I used a low-pressure spray to rinse it away. This method, detailed in this guide, saves time and reduces the risk of surface damage. Always choose the right cleaning agents for the surface and stains you’re tackling—using the wrong chemical can cause discoloration or deterioration.
Work in Sections for Consistent Results
During my first big project, I tried to tackle the entire house at once—big mistake. I ended up with uneven cleaning and missed spots. Now, I divide the job into sections, working from the top down. I start at the roof, then move to walls and finally the lower areas. This approach, supported by strategies from this article, ensures each area gets adequate attention and dries evenly. Overlapping sections slightly prevents streaks and promotes uniformity.
Inspect and Adjust as You Go
I used to finish a job and realize I missed a spot or over-sprayed. Now, I regularly inspect my work. After each section, I step back and look for missed spots or streaks. If I see areas that need more attention, I adjust my distance or pressure accordingly. Think of it like painting a wall—constant inspection ensures a flawless finish. This habit, emphasized in this resource, helps catch issues early and saves you from redoing work later.
Many DIY enthusiasts and even seasoned pros often fall into traps that undermine their power washing results. The most common misconception is that higher pressure always equals better cleaning. In reality, applying too much pressure can damage surfaces like siding or wood, leading to costly repairs. Instead, understanding the nuanced balance between pressure, nozzle type, and spray angle is crucial. For example, a 25-degree nozzle at moderate pressure often provides the best results without risking damage, especially on delicate surfaces. To master this, check out this guide that breaks down optimal equipment choices and techniques.
To keep your power washing equipment performing at its best and ensure consistently stunning results, investing in the right tools and following a proper maintenance routine is crucial. From selecting the durable nozzles to scheduling regular upkeep, these practices extend the lifespan of your gear and maximize cleaning efficiency.
Choose High-Quality Nozzles and Accessories
My go-to nozzles are always the professional-grade, adjustable ones that allow me to fine-tune spray angles and pressure. I personally favor a 25-degree nozzle for most residential projects because it offers a balanced spray that cleans effectively without damaging surfaces. When I need to tackle stubborn grime on concrete or brick, I switch to a turbo or surface cleaner attachment, which provides more uniform coverage and saves time. High-quality accessories are built to withstand the high pressures involved, reducing the risk of breakage and ensuring consistent results over many jobs. For guidance on selecting the best equipment, I recommend checking out this resource.
Routine Maintenance to Keep Your Equipment in Top Shape
Regularly inspecting and cleaning your pressure washer prevents buildup of dirt, mineral deposits, and corrosion. I always drain the pump after each use, especially if I won’t be working for a few days, to prevent internal damage. Replacing worn-out hoses and seals periodically also keeps the system running smoothly. Additionally, I use a pump protector solution before storing my equipment for extended periods, which helps prevent freezing and corrosion. Following these steps ensures that your machinery remains reliable and ready for your next project.
Predicting Future Trends in Power Washing Tools
Advancements in technology are making power washing more efficient and eco-friendly. I believe we’ll see smarter, more energy-efficient pumps and nozzles that adapt pressure based on the surface, reducing water usage and surface damage. Automation and remote diagnostics are also on the horizon, making maintenance even easier. Staying updated with these innovations can give you a competitive edge and keep your results trustworthy over time. For expert insights on equipment strategies, check out this article.
How do I maintain my pressure washer over time?
Maintaining your power washing equipment involves regular cleaning, inspecting for wear and tear, and proper storage. Make sure to flush out residual chemicals after each job, check hoses and fittings for leaks, and replace any worn parts promptly. Using manufacturer-recommended lubricants and protective solutions helps prolong the lifespan of your pump and motor. Also, scheduling periodic professional servicing can prevent costly breakdowns and keep your system running at peak performance. This proactive approach ensures your investment continues to deliver trustworthy results, season after season.
Ready to level up your maintenance routine? Try incorporating a pump protector solution into your end-of-day cleanup—it’s a simple yet effective step that can save you headaches down the line!
What I Wish I Knew When I Started Power Washing
- One of the toughest lessons was realizing that more pressure isn’t always better. Using the right nozzle, pressure, and distance is what truly makes the difference.
- I’ve learned that surfaces like wood and vinyl require gentle techniques; rushing can cause costly damage. Patience and technique trump brute force every time.
- My biggest breakthrough was understanding the importance of working in sections and inspecting my work regularly. It saved me time and ensured consistent, professional results.
- Investing in quality nozzles and attachments has paid off — durability and precision are worth every penny, especially when tackling tough grime or delicate surfaces.
My Favorite Tools and Resources for Power Washing
For reliable equipment, I rely on this guide which breaks down the best nozzles and accessories for different surfaces. It’s helped me select tools that last and perform consistently. To sharpen my skills, I turn to this training course, packed with expert techniques that elevate my results. Lastly, I keep up with latest strategies to ensure I stay ahead of industry trends and deliver trustworthy, lasting cleanings.
Embrace Your Power Washing Journey Today
Power washing is more than just a quick clean — it’s a skill that, when mastered, transforms your surfaces and builds your confidence. Don’t shy away from experimenting and learning; every project brings new insights. With the right techniques, tools, and mindset, you can achieve professional-grade results in 2024 and beyond. So, are you ready to elevate your power washing game and see the difference it makes? Dive in and start applying these proven strategies today!
I totally relate to the frustration early on when I would just blast away with excessive pressure and end up damaging surfaces or missing spots. Your emphasis on selecting the right nozzle and maintaining proper distance really hit home for me. Since I started paying closer attention to spray angles and working in sections, my results improved dramatically. I also found that pre-treating stubborn stains with eco-friendly solutions can save so much time and effort, especially on concrete or driveways. It’s interesting how a little patience and technique mastery can turn a daunting task into a straightforward process. What specific tips do you have for tackling textured or porous surfaces like brick or stucco without overdoing it? I’d love to hear more techniques from experienced power washers who have mastered these tricky materials.
Reading through this post really resonated with my early experiences in power washing. I used to think that simply turning up the pressure was enough, but I quickly learned that surface type and technique matter just as much, if not more. I especially agree with the importance of starting with wider spray angles and lower pressure to protect delicate surfaces. One thing I’d add is that pre-treating stubborn grime with a suitable cleaner can make a big difference, often reducing the need for aggressive pressure. That said, I still sometimes struggle with uneven results on textured surfaces like stucco or brick. I’ve found that adjusting the spray angle and moving the wand slowly, overlapping each pass, helps to avoid missing spots or causing damage. Has anyone found effective ways to clean porous surfaces without saturating or damaging them? I’d love to hear tips from experienced pros or fellow DIYers who have mastered this aspect.