I vividly remember the first time I attempted to power wash my driveway. I was eager, full of confidence, and armed with a generic pressure washer I bought on a whim. After a few minutes, I was drenched and frustrated. The surface looked worse than before, and I ended up wasting hours with zero satisfying results. That lightbulb moment taught me a hard lesson: wrong equipment and tools can make or break your power washing success.
Why Choosing the Proper Power Washer Equipment Is a Game Changer
Since that messy day, I’ve learned that effective power washing isn’t just about the effort; it’s about having the right gear. The market is flooded with options, but investing in quality equipment tailored to your specific surfaces and needs makes all the difference. Proper tools can boost efficiency, improve results, and save you a lot of elbow grease in the long run. In fact, using suitable equipment correctly can cut cleaning time by half, as highlighted in this comprehensive guide.
Is It Really Worth the Hype to Invest in Advanced Power Washer Tools?
Initially, I was skeptical. I wondered if spending extra on high-end tools was just a marketing ploy. Here’s the deal: my early mistake was opting for an inexpensive, low-pressure machine. It lacked the power and adaptability needed for stubborn stains and delicate surfaces alike. That mistake taught me that while budget options might be tempting, they often underperform and lead to frustration. Instead, investing in the right equipment not only boosts your results but also extends the lifespan of your tools, ensuring reliable performance over time. For tips on selecting top-tier equipment, check out this ultimate guide.
Now, I want to hear from you. Have you faced similar struggles trying to get your power washing just right? If so, stay tuned because next, we’ll dive into the essential tools and techniques to maximize your results and achieve a lasting clean. Whether you’re tackling your driveway, patio, or siding, mastering the right equipment and strategies is your key to becoming a power washing pro.
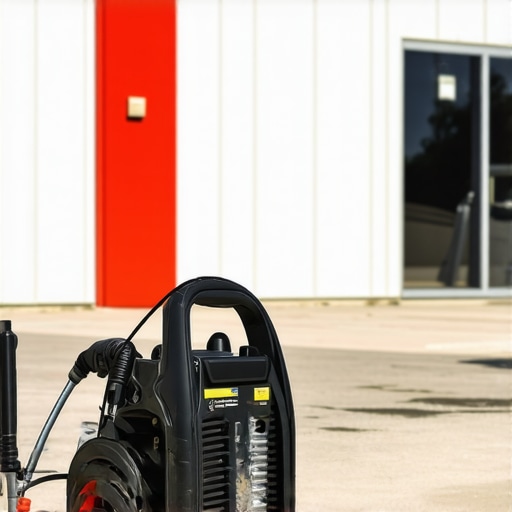
Prepare Your Equipment and Space
Start by inspecting your power washer to ensure it’s in good condition—check hoses, nozzles, and the pressure knob. Clear the area of obstacles and delicate plants. Think of your power washer as a paintbrush; you wouldn’t start painting without preparing your canvas—similarly, cleaning success begins with proper setup.
Select the Right Nozzle and Pressure Settings
Choose a nozzle that matches your surface; for concrete, a 25° or 40° nozzle is effective. Set your pressure between 3000 to 4000 PSI for driveways, but avoid exceeding this to prevent damage. Remember, it’s easier to start with lower pressure and increase gradually than to damage surfaces or create streaks. I once tried maxing out the pressure on a fragile porch surface, which caused chips—lesson learned the hard way.
Pre-Treat Stubborn Stains
Apply a suitable detergent or stain remover to tackle grease or moss. Let it sit for 10-15 minutes; don’t rush this step. Use a garden sprayer to evenly distribute the cleaner. As I experienced during a recent clean, pre-treating a moss-covered walkway made my pressure washing significantly easier, reducing the need for excessive force.
Maintain Proper Technique During Washing
Hold the wand at a 45-degree angle to the surface, keeping it about 12 inches away. Use smooth, sweeping motions, overlapping each pass slightly—think of your spray pattern as painting with broad strokes. Move systematically across the surface, avoiding pauses that can cause uneven cleaning or streaks. During one messy session, I started too close, which caused streaks, but adjusting the distance improved the aesthetics instantly.
Work in Sections for Consistency
Divide your surface into manageable sections. Tackle each one thoroughly before moving on. This approach prevents missing spots and keeps your work organized. I learned the importance of this when rushing through my driveway, leaving patches less clean than others; breaking it into sections helped ensure uniformity.
Post-Cowerrin Techniques to Seal the Deal
After washing, inspect the surface for missed spots. Use a wide-angle nozzle to rinse off any remaining detergent. For extra durability, consider applying a sealant for concrete to protect against future stains and weathering. Sealing isn’t necessary every time but adds long-term value. I applied sealant after my last clean, and the driveway stayed looking fresh much longer.
Review and Adjust Your Approach
Every surface responds differently. Take notes during each session—if streaks appear, adjust your distance or pressure. Consistent refinement develops your skill and confidence. Remember, patience is key; rushing can lead to damage or poor results. Small adjustments, made systematically, yield the best cleaning outcomes.
Even seasoned enthusiasts sometimes overlook the subtle nuances of power washing, leading to mistakes that weaken results or damage surfaces. One common misconception is the belief that higher pressure always equates to cleaner results. In reality, aggressive pressure can deteriorate delicate surfaces like wood siding or aged concrete, causing chips or even lasting damage. Advanced techniques recommend adjusting pressure based on material, which you can learn more about in the detailed strategies at this expert guide.
A frequent trap is focusing solely on pressure without considering nozzle selection and spray angle. Many assume a single nozzle fits all tasks, but using a 15-degree nozzle on a driveway might strip loose paint instead of cleaning stains, or worse, damage the surface. Mastery involves choosing the right nozzle and adjusting spray distance accordingly. For a comprehensive understanding, see this detailed equipment advice.
One nuanced but often overlooked point is pre-soaking surfaces to prevent staining and facilitate cleaner results. Using detergents effectively and allowing enough dwell time before rinsing dramatically enhances cleanliness, especially on moss or grease spots. An expert approach suggests applying a biodegradable cleaner, letting it sit for 10-15 minutes, then rinsing—this prevents the common mistake of rushing the process, which often leads to mediocre results. Learn more in this ultimate guide.
What about more sophisticated questions? One advanced aspect is understanding the impact of water flow rate and pressure on cleaning efficacy. While high pressure is visible and impressive, the flow rate (GPM) often plays a more critical role in removing stubborn dirt without surface damage. A study by the Power Washers Association highlights the importance of balancing PSI and GPM for optimal results, emphasizing that the right mix depends on the surface and stain severity. To refine your technique, check out this comprehensive resource.
Finally, be aware that misuse of equipment due to misunderstandings about these nuances can lead to costly repairs or safety hazards. Proper education, equipment calibration, and technique adjustment are the cornerstones of truly trustworthy power washing. Think you’ve been making some of these mistakes? Share your experience or questions in the comments and let’s ensure your next clean is your best yet.
Keep Your Power Washer Running Smoothly for Long-Term Success
Investing in high-quality equipment is just the first step; maintaining your power washer over time ensures it continues delivering top results. Regular maintenance not only prolongs the lifespan of your tool but also prevents costly repairs down the line.
Start by inspecting hoses and fittings after every use for signs of wear or leaks. A quick check can catch issues early before they escalate. I’m personally a fan of using Silicone Spray on fittings and moving parts—I find it reduces corrosion and keeps everything operating smoothly. Remember to drain the pump and hoses if you’re storing the machine for an extended period, such as over winter. This prevents freezing damage and buildup of debris inside the system.
Essential Tools for Effective Maintenance
Having the right tools makes maintenance easier and more effective. I highly recommend keeping a set of adjustable wrenches for tightening fittings and a cleaning brush to remove dirt from nozzles and filters. A dedicated nozzle cleaning kit is invaluable for preventing clogs, which are a common culprit of pressure drops and inconsistent spray patterns.
Additionally, investing in a Pump Protector Solution can safeguard your system from corrosion and scale buildup. Applying this every few months, especially if you use the washer frequently, will keep your equipment performing at peak efficiency. Regularly replacing the nozzles based on wear is also critical—worn nozzles can reduce pressure and damage surfaces.
Adopt a Routine for Longevity
Develop a maintenance routine that fits your usage pattern. For example, after each use, flush the system with clean water and inspect it for leaks or damage. Every 50 hours of operation, consider changing the pump oil—consult your manufacturer’s guidelines for specific intervals. Staying consistent with these simple steps prevents unexpected breakdowns and ensures your power washer is always ready when you need it.
Looking ahead, advances in smart technology might soon offer sensors that monitor your equipment’s health in real time, alerting you to maintenance needs before issues arise. Until then, applying proven maintenance practices remains the best strategy for reliable power washing results over the long haul.
How do I maintain my power washer over time?
Typical maintenance involves regular inspection, cleaning filters and nozzles, applying corrosion protectants, and storing the equipment properly. For a detailed guide on extending your power washer’s lifespan, check out this comprehensive resource. Try implementing a simple routine today—your future self will thank you for the reliable performance and saved costs.

The Hardest Lesson I Learned About Power Washing
One pivotal moment was realizing that rushing the process often leads to damage or subpar results. Patience and proper technique trump brute force every time. I also learned that neglecting equipment maintenance causes inconsistent performance, which can undo your hard work. Finally, understanding surface-specific requirements prevents costly mistakes, like using high pressure on delicate sidings—trust me, I’ve been there.
My Arsenal for Power Washing Success
Over time, I’ve found that certain tools transform your results. A quality adjustable nozzle set gives you the flexibility to match pressure with surface needs. A reliable surface cleaner attachment saves hours on large areas and ensures even cleaning. For detergents, I swear by eco-friendly options that tackle stubborn stains without harm. Keeping a maintenance kit handy— including nozzle cleaners and spare hoses— helps me stay ready for any job. Check out this resource for my top picks.
Embrace the Power of Patience and Precision
Power washing isn’t just about the spray; it’s about respecting the surfaces and understanding the nuances. Developing a systematic approach has been a game changer, turning messy projects into satisfying transformations. Whether it’s pre-treating stains or adjusting pressure mid-session, every detail counts. So I challenge you: get your equipment dialed in, take your time, and celebrate your progress as you see surfaces come alive again. Your next power washing session awaits—are you ready to make it your best? Share your experiences or questions below and join the community of enthusiasts
.
Reading through this post really highlights how crucial the right equipment is for effective power washing. I remember my first attempt, where I used a borrowed, low-pressure machine. The results were disappointing, and it took me much longer than expected to get decent results. Since then, I’ve invested in a quality surface cleaner and adjustable nozzles, and the difference is night and day. I also learned the importance of pre-treating stubborn stains with eco-friendly detergents—especially on mossy or greasy surfaces. For anyone new to this, do you think that starting with high-end equipment is necessary, or can beginners achieve similar results with mid-range tools? I believe that, with proper technique and patience, even enthusiasts on a budget can master power washing. What’s been your experience with balancing budget and quality when selecting equipment?
I completely agree with this post. I started out with a basic pressure washer, and I quickly realized that it wasn’t enough for tougher stains or larger jobs. Upgrading to a surface cleaner attachment and adjustable nozzles really changed the game for me. My driveway looks brand new now! I’ve found that pre-treating moss and grease with eco-friendly cleaners, as mentioned, makes a huge difference—allowing the power washer to do its best work without using excessive pressure. It’s interesting how the right technique, like maintaining the ideal distance and working in sections, prevents streaks and damage.
I’ve also learned that consistent maintenance of the equipment, like cleaning nozzles and checking hoses, keeps performance optimal and extends the lifespan of my tools. For those on a budget, do you think investing in a mid-range pressure washer with a few key attachments can deliver results comparable to high-end models? I’d love to hear how others balance cost and efficiency.