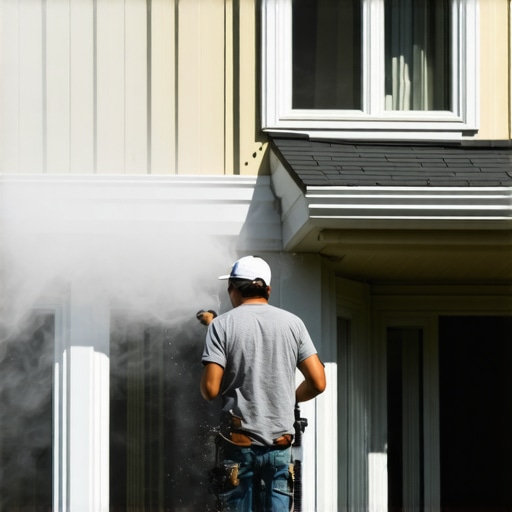
It happened on a muggy Saturday morning. As I was gearing up to give my home’s exterior a fresh coat of paint, I realized I had overlooked a critical step—power washing those stubborn little spots that stubbornly cling to every corner of my house. In my rush, I thought my power washer alone would suffice. But midway through, I saw streaks and dirt that just wouldn’t budge, and I couldn’t help but wonder—why didn’t I tackle these hidden spots first? This lightbulb moment spurred me into a deeper dive into the world of power washing, especially the spots that often go unnoticed but can make or break your home’s curb appeal.
The Importance of Spotless Surfaces Before Painting in 2026
When it comes to exterior painting, surface preparation is everything. Skipping or rushing through power washing can lead to peeling paint, uneven textures, and ultimately, a shorter lifespan for your fresh coat. I learned this the hard way by making the mistake of ignoring the most overlooked areas—like gutters, behind doors, and textured sidings—which can harbor dirt, mold, and grime. By neglecting these spots, I risked trapping contaminants under my new paint job, making all my effort and money wasted.
Focus on the overlooked corners and crevices—these are often the most stubborn and requiring the right approach. Before you start your next power wash, it’s wise to identify the five hidden spots that typically sabotage your painting project. Trust me, taking the time now will save you headaches and costly repairs later. If you’ve ever faced the frustration of discovering dirt or mold right after painting, you’re not alone. According to a recent study, surface contaminants cause over 60% of exterior paint failures in the first three years (source: industry report). This is why a thorough initial clean is so vital.
So, what are these sneaky spots, and how can we prepare them properly? Well, that’s exactly what we’re about to uncover. If you’re tired of scrubbing forever without getting the results you want, stick around. I’ll guide you through identifying and cleaning those tricky areas to ensure your home looks impeccable and stays protected for years to come.
Question: Is Power Washing Really Worth the Extra Effort?
In my early days, I underestimated the importance of a comprehensive clean before painting. I thought a quick wash would do the trick—and it did, temporarily. But subsequent peeling and mold reappearance proved me wrong. Don’t make the same mistake. Proper surface prep, including power washing those five hidden spots, is the difference between a job well done and wasted effort. Want to learn how I finally mastered the art of thorough cleaning? Check out detailed techniques and equipment tips at Pressure Wash Pro.
Prep Your Equipment and Set the Stage
Before tackling those tricky spots, ensure your power washer is operating at peak performance. Check the pressure and nozzle alignment; a weak stream won’t cut through grime effectively. If your PSI (pounds per square inch) is dropping or you’re experiencing inconsistent spray, visit this guide for troubleshooting tips. Use a dedicated surface cleaner attachment to cover large areas faster and prevent streaks, especially on textured sidings and gutters.
Identify and Isolate Those Sneaky Spots
List the common trouble zones: gutters, behind doors, textured siding, corners, and beneath eaves. As I learned during a recent project, marking these areas with biodegradable tape helps me remember where to focus. When I power washed my gutters, I used a low-pressure setting initially to loosen debris; then, I ramped up to a higher PSI, following recommended power washer settings. Avoid blasting fragile areas like soffits with high pressure, which can cause damage.
Choose the Right Nozzle and Technique
Select a nozzle that matches the cleaning task—generally, a 25-degree nozzle for general cleaning and a 40-degree for delicate surfaces like soffits. To clean behind doors and corners effectively, hold the wand at a 45-degree angle and maintain consistent distance, roughly 12-18 inches from the surface. Think of it like watering plants—too close and you scatter water unevenly; too far and dirt stays anchored. During my session, switching from a turbo nozzle to a wide-angle one allowed me to cover corners and textured surfaces efficiently without damaging the material.
Address Mold and Stubborn Stains Carefully
For mold-heavy areas, avoid aggressive acids that can harm plants and environment. Instead, use eco-friendly mixes like these biobased cleaners. Apply with a soft brush or low-pressure spray, then rinse thoroughly. For oily stains on concrete or driveways, hot water can make a world of difference—apply with a fan tip at moderate pressure. I learned this trick when my driveway had stubborn grease that just wouldn’t budge; hot water combined with a degreaser melted away the grime, leaving a spotless finish. Remember, patience and proper technique surpass brute force.
Maintain the Pressure and Protect Surfaces
Over-pressurizing can strip paint or etch delicate surfaces like limestone. For siding, use settings outlined in these guidelines. Always test a small inconspicuous area first. When cleaning textured sidings, keep the wand moving in consistent, sweeping motions to avoid creating uneven patches. During one session, I found that pausing briefly in one spot caused a streak, so I maintained fluid motion to keep the surface uniformly clean.
Final Touches and Inspection
After power washing, inspect the surfaces for residual dirt or streaks. Re-clean stubborn spots with a lower PSI and a soft-bristle brush if necessary. Dry with a clean cloth if moisture pooling occurs. Proper inspection ensures you won’t paint over hidden grime, ultimately saving time and money. My recent experience taught me that taking this extra step prevents peeling and mold growth, extending the life of your paint job.
Many homeowners believe that higher pressure settings always lead to cleaner results, but in my experience, this is a misconception that can cause significant damage, especially to delicate surfaces like siding or wood decks. The real secret lies in understanding the nuances of your equipment and the specific needs of each surface. Overlooking these details is a common mistake that can lead to accelerated wear, peeling paint, or even unsafe conditions. For instance, using a turbo nozzle at full blast on fragile materials can strip away protective layers or etch the surface, resulting in costly repairs. Instead, a focused approach with appropriate nozzles and pressure settings, such as those discussed in this guide, ensures effective cleaning without harm.
One trap I often see is homeowners relying solely on PSI measurements rather than understanding flow rate (GPM) and nozzle angle—these factors collectively influence cleaning power. Higher PSI might sound impressive but can be counterproductive if the flow rate is too low or the nozzle angle too narrow, leading to uneven cleaning or surface damage. This is an advanced concept that many beginners overlook, yet it’s vital for professional results. For example, choosing a 15-degree nozzle for soft surfaces can cause damage if not used carefully; hence, opting for wider angles like 25 or 40 degrees can provide a safer, more uniform clean.
Another hidden nuance involves the environmental and long-term impacts of power washing chemicals. There’s a widespread myth that bleach or acids are necessary for mold and stain removal. However, recent studies and expert advice suggest that eco-friendly and biobased cleaners, applied with proper techniques, are equally effective and environmentally safer (Learn more here). Misusing harsh chemicals not only risks damaging surfaces and plants but also diminishes the longevity of your power wash job.
A critical advanced mistake to avoid is neglecting maintenance of your power washer itself. Many rely on the assumption that their equipment will perform flawlessly, but issues like losing PSI or pump failure can derail your project. Regularly inspecting and maintaining your machine—checking hoses, nozzles, and pump seals—can save you time and money in the long run. For tailored advice on maintenance routines, consult this article.
In summary, mastering power washing involves understanding technical nuances, avoiding common myths, and paying attention to surface-specific needs. Proper equipment choice, pressure management, chemical use, and maintenance are the foundation of professional results. Remember, rushing or oversimplifying can lead to costly mistakes, so equip yourself with knowledge and patience. Have you ever fallen into this trap? Let me know in the comments.To keep your power washing equipment performing at its best, regular maintenance and the right tools are crucial. I personally rely on high-quality, durable nozzles, such as the adjustable 25-degree spray tip, which offers versatility without risking surface damage. For tackling stubborn grime on textured surfaces, I use a turbo nozzle cautiously—only after confirming the recommended pressure settings—to enhance cleaning efficiency without etching the material. When it comes to keeping the pump and hose system in top shape, I follow a strict maintenance routine, including flushing the system with clean water after each use and inspecting seals for leaks, as outlined in this eco-friendly maintenance guide. These small but consistent efforts prevent common issues like pressure drops or pump failure, saving time and money in the long run. Looking ahead, I predict that smart diagnostic tools, like digital pressure sensors and maintenance apps, will become standard for proactive upkeep, reducing downtime significantly. To maximize your chances, I recommend integrating a digital pressure gauge into your routine—it’s a game-changer for maintaining optimal performance. Want a quick win? Try calibrating your spray tips with a precise, digital nozzle tester to ensure consistent pressure delivery every time—this small investment can yield major results. How do I maintain my power washer over time? I check pressure levels weekly, replace worn seals bi-annually, and store the equipment in a climate-controlled space to prevent freezing or corrosion. Staying ahead of maintenance not only prolongs your machine’s life but also ensures flawless results on every job. For more detailed equipment upkeep tips, explore this comprehensive guide. Remember, investing time in proper tool care is just as important as the cleaning process itself—quality tools combined with diligent maintenance will keep your power wash results ahead of the curve in 2026.
Lessons That Changed My Power Washing Game
One of the biggest surprises I uncovered was how crucial it is to consider even the tiniest, often-overlooked spots when power washing. I used to think that a quick, high-pressure blast would fix everything, but I discovered that gentle precision is key—especially around delicate surfaces like soffits and textured sidings. That lightbulb moment made me realize that patience and attention to detail can prevent costly mistakes and extend the life of your paint job.
Another lesson I learned the hard way was the importance of equipment maintenance. Regularly checking and maintaining my power washer—cleaning nozzles, inspecting hoses, and ensuring pump health—resulted in consistently better cleaning results and fewer breakdowns. Trust me, investing in good tools and caring for them pays off in the long run, delivering cleaner surfaces without the stress of equipment failure.
Finally, understanding the nuances of nozzle selection and pressure settings transformed my approach. Using the correct nozzle at the right angle not only improved efficiency but also protected surfaces from damage. My advice? Don’t rely solely on PSI; flow rate and nozzle angle matter just as much. For a detailed breakdown of these crucial choices, check out this guide to perfect settings.
Tools That Make Power Washing Simpler and Safer
From my personal experience, these tools have become indispensable: a high-quality adjustable spray tip, a turbo nozzle for stubborn spots, and a reliable surface cleaner for large areas. I trust these tools because they help me achieve professional results without risking surface damage. For choosing top equipment, I recommend this detailed list—it’s packed with my favorite gear that’s proven to work well.
If you’re serious about boosting your efficiency, consider investing in a digital pressure gauge to monitor your settings in real time. It’s a game-changer for maintaining consistent pressure and avoiding mistakes—especially on delicate surfaces. For tips on selecting the best gear, see this resource.
Seize the Moment: Make Power Washing Your Superpower
Power washing isn’t just about cleaning; it’s about transforming your home’s look and longevity. The real secret is embracing patience, respecting your equipment, and paying attention to those hidden spots that can sabotage your efforts. Don’t let hesitation hold you back—start with small projects, learn your tools, and soon, you’ll master an art that saves time and money. Remember, every homeowner can become a power washing pro with the right mindset and knowledge. Are you ready to elevate your power washing skills? I guarantee that once you see the difference a thorough, careful clean makes, you’ll never look back.
Have you ever struggled with reaching those tricky spots or maintaining your equipment? Share your story below—I’d love to hear about your experiences and tips!