I vividly remember the first time I tried power washing my driveway. Instead of the sparkling clean surface I envisioned, I ended up with streaks, missed spots, and a whole lot of frustration. It was a lightbulb moment for me—realizing that without the right techniques and equipment, even the most powerful machine can fall short. Over time, I learned that boosting my results isn’t just about cranking up the pressure, but about understanding the nuances that make a real difference.
Why Proper Power Washing Techniques Matter More Than Ever in 2024
Today, with the increasing demand for pristine exteriors and the rise of DIY projects, more homeowners are diving into power washing. But here’s the thing—many are wasting time and money on methods that don’t deliver trustworthy results. That’s why I’m here to share proven strategies that will elevate your power washing game this year. Whether you’re tackling stubborn stains, moss, or grime, using the right approach can make all the difference. And believe me, a little knowledge can save you hours of rework and even prevent costly equipment mistakes.
Have you ever faced the frustration of poor cleaning results despite using a powerful pressure washer?
If so, you’re not alone. I made the mistake early on of assuming that more pressure alone would do the trick. That’s a common misconception that can actually damage surfaces or leave dirt behind. The good news is, once I adopted some simple, effective techniques—like adjusting nozzle angles and knowing when to switch pressure levels—I started seeing real improvements. Want to learn how to do the same? I’ll guide you through the essential tips and the best equipment choices that will ensure your next project is a success. For more detailed advice, check out this comprehensive guide.
In the following sections, we’ll explore the most effective strategies to boost your results—so you can confidently tackle any surface with trust and precision. Ready to take your power washing to the next level? Let’s dive in!
Prep Your Equipment for Peak Performance
Before diving into your power wash, ensure your equipment is in top shape. I once neglected this step and ended up with uneven results, wasting hours redoing the job. Check hoses, nozzles, and filters for any leaks or blockages. Opt for high-quality nozzles with adjustable spray patterns to give you more control. For the best equipment options, visit this guide. Proper maintenance and quality tools are your foundation for trustworthy cleaning results.
Choose the Right Nozzle for Each Surface
Using the correct nozzle is crucial. I learned this the hard way when I used a wide-angle nozzle on my driveway, leaving streaks. Switch to a 25-degree nozzle for concrete and tougher surfaces, and save the 40-degree or wider nozzles for softer surfaces like siding or decks. Think of nozzles as paintbrushes—each has a purpose. For detailed nozzle selection tips, check out this resource.
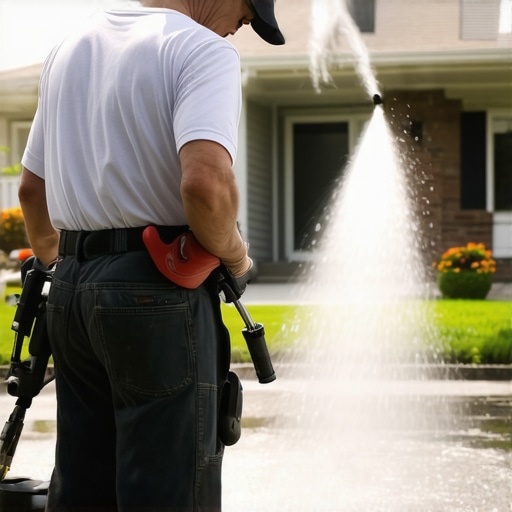
Master the Spray Technique for Maximum Coverage
Hold the wand at a consistent 45-degree angle and keep it moving steadily. I once focused on one spot too long, causing damage and streaks. Keep your spray parallel to the surface and work in overlapping passes, like mowing a lawn—this ensures even cleaning. Practice makes perfect, so test your technique on a small area first. For more on effective spray methods, see this comprehensive guide.
Adjust Pressure Based on Surface Sensitivity
Understanding when to dial down pressure is vital. I once used high pressure on my wood fence, causing splinters. Always start with low pressure, especially on delicate surfaces. For concrete, you can safely crank it up, but for siding, brick, or wood, moderate pressure is best. Use the pressure control feature on your machine to prevent damage. For more detailed pressure settings, visit this page.
Use Proper Cleaning Solutions When Necessary
While pressure alone works for many jobs, stubborn stains or moss require cleaning solutions. I made the mistake of skipping this step and only got surface dirt. Apply detergents or eco-friendly cleaning agents with a pump sprayer, then rinse thoroughly. Be sure to follow manufacturer instructions to avoid surface damage. For trusted cleaning products and techniques, see this article.
Final Rinse and Inspection
Always finish with a thorough rinse to remove any residual soap or dirt. Walk around your surface to inspect missed spots or streaks. I once rushed this step and had to go back, wasting time. A clean, even finish is the mark of a professional job. For tips on final touches, review this guide.
< >
>
Many DIY enthusiasts and homeowners jump into power washing with good intentions, but often, they fall prey to misconceptions that can undermine their efforts. Let’s dig deeper into some of the most common myths about power washing and reveal the nuanced truths that can elevate your results in 2024.
Why More Pressure Isn’t Always Better
One of the biggest misconceptions is that cranking up the pressure will automatically give you a cleaner surface. In reality, excessive pressure can damage delicate surfaces like wood, siding, or painted surfaces, leading to costly repairs. Instead, understanding the importance of adjusting your pressure based on the material is crucial. For instance, using a lower PSI with the right nozzle ensures you remove dirt without causing harm. For a comprehensive guide on optimal pressure settings, visit this resource.
Common Mistake: Overlooking Surface Preparation
Many overlook the significance of proper prep work, assuming power washing alone will do the job. Dirt, moss, or algae can hide in crevices or porous materials, making pre-treatment with suitable cleaning solutions essential. Applying eco-friendly detergents and letting them sit for a few minutes can loosen stubborn grime, resulting in a more thorough clean. Skipping this step often leads to incomplete results and the need for rework. Check out this article for expert tips on effective pre-treatment techniques.
Advanced Question: How do nozzle angles influence cleaning effectiveness?
Many beginners believe that the wider the spray, the better. However, nozzle angles play a critical role in controlling the force and coverage of your spray. A 15-degree nozzle delivers a concentrated, high-impact jet ideal for tough stains on concrete, whereas a 40-degree nozzle provides a softer spray suitable for siding or decks. Mastering nozzle selection can drastically improve your results and prevent damage. For detailed guidance, explore this expert guide.
Have you ever fallen into this trap? Let me know in the comments. Proper knowledge about pressure levels, surface prep, and nozzle choice can save you time, money, and headaches. Remember, the key to successful power washing isn’t just brute force but strategic technique and understanding the nuances involved. With these insights, you’re well on your way to professional-quality results every time.
Maintaining your power washing equipment is crucial for ensuring consistent, reliable results and extending the lifespan of your tools. Over time, even the most durable machines can suffer from wear and tear, leading to decreased performance and costly repairs. That’s why I prioritize regular upkeep and using the right tools for the job. One of my go-to strategies is to perform routine inspections of hoses, nozzles, and filters after each project. Checking for leaks or blockages helps prevent breakdowns and maintains optimal pressure levels. For equipment that’s been in use for a while, I recommend replacing worn-out nozzles with high-quality, adjustable spray patterns, which I personally find improve control and efficiency. To keep my pressure washer running smoothly, I also give it a thorough flush with clean water after each use, especially if I’ve used cleaning solutions or detergents. This prevents buildup inside the system and reduces corrosion risks. For more on selecting the best equipment and maintaining it properly, check out this detailed guide.
How do I maintain power washing tools over time?
Regular maintenance is the key to keeping your power washing tools in top shape. I set a monthly schedule to inspect all parts, apply lubrication to moving components, and replace any damaged hoses or filters. Using eco-friendly cleaning solutions also helps prevent buildup inside the machine, which can cause corrosion or clogs. Additionally, I recommend storing equipment in a dry, sheltered space to avoid exposure to the elements, which can accelerate wear. Investing in a maintenance kit that includes nozzles, O-rings, and filter replacements makes it easier to perform quick upgrades as needed. As trends evolve, more advanced machines now incorporate smart sensors that alert you when parts need servicing, which I believe will become standard in the near future. For now, sticking to a disciplined maintenance routine ensures your equipment will perform reliably project after project. For the best long-term results, I suggest exploring these expert maintenance tips.
Tools I recommend for lasting performance
From my experience, investing in high-quality nozzles like the Turbo Nozzle or adjustable spray guns significantly improves cleaning efficiency and reduces equipment strain. I personally prefer the top-rated models outlined here because of their durability and versatility. Additionally, a good detergent applicator makes pre-treatment easier, especially for stubborn stains or moss. I use a foam cannon attachment, which allows me to evenly distribute cleaning solutions without waste. For routine maintenance, a pressure washer pump protector is invaluable—by applying it monthly, I prevent corrosion and extend the life of my machine. Looking ahead, I predict that smart maintenance tools—like IoT-connected sensors—will become more widespread, making upkeep even simpler. In the meantime, sticking to proven equipment and maintenance routines will keep your power washer working reliably for years. For detailed equipment recommendations, visit this resource.
I vividly remember the first time I tried power washing my driveway. Instead of the sparkling clean surface I envisioned, I ended up with streaks, missed spots, and a whole lot of frustration. It was a lightbulb moment for me—realizing that without the right techniques and equipment, even the most powerful machine can fall short. Over time, I learned that boosting my results isn’t just about cranking up the pressure, but about understanding the nuances that make a real difference.
Why Proper Power Washing Techniques Matter More Than Ever in 2024
Today, with the increasing demand for pristine exteriors and the rise of DIY projects, more homeowners are diving into power washing. But here’s the thing—many are wasting time and money on methods that don’t deliver trustworthy results. That’s why I’m here to share proven strategies that will elevate your power washing game this year. Whether you’re tackling stubborn stains, moss, or grime, using the right approach can make all the difference. And believe me, a little knowledge can save you hours of rework and even prevent costly equipment mistakes.
Have you ever faced the frustration of poor cleaning results despite using a powerful pressure washer?
If so, you’re not alone. I made the mistake early on of assuming that more pressure alone would do the trick. That’s a common misconception that can actually damage surfaces or leave dirt behind. The good news is, once I adopted some simple, effective techniques—like adjusting nozzle angles and knowing when to switch pressure levels—I started seeing real improvements. Want to learn how to do the same? I’ll guide you through the essential tips and the best equipment choices that will ensure your next project is a success. For more detailed advice, check out this comprehensive guide.
In the following sections, we’ll explore the most effective strategies to boost your results—so you can confidently tackle any surface with trust and precision. Ready to take your power washing to the next level? Let’s dive in!
Prep Your Equipment for Peak Performance
Before diving into your power wash, ensure your equipment is in top shape. I once neglected this step and ended up with uneven results, wasting hours redoing the job. Check hoses, nozzles, and filters for any leaks or blockages. Opt for high-quality nozzles with adjustable spray patterns to give you more control. For the best equipment options, visit this guide. Proper maintenance and quality tools are your foundation for trustworthy cleaning results.
Choose the Right Nozzle for Each Surface
Using the correct nozzle is crucial. I learned this the hard way when I used a wide-angle nozzle on my driveway, leaving streaks. Switch to a 25-degree nozzle for concrete and tougher surfaces, and save the 40-degree or wider nozzles for softer surfaces like siding or decks. Think of nozzles as paintbrushes—each has a purpose. For detailed nozzle selection tips, check out this resource.
Master the Spray Technique for Maximum Coverage
Hold the wand at a consistent 45-degree angle and keep it moving steadily. I once focused on one spot too long, causing damage and streaks. Keep your spray parallel to the surface and work in overlapping passes, like mowing a lawn—this ensures even cleaning. Practice makes perfect, so test your technique on a small area first. For more on effective spray methods, see this comprehensive guide.
Adjust Pressure Based on Surface Sensitivity
Understanding when to dial down pressure is vital. I once used high pressure on my wood fence, causing splinters. Always start with low pressure, especially on delicate surfaces. For concrete, you can safely crank it up, but for siding, brick, or wood, moderate pressure is best. Use the pressure control feature on your machine to prevent damage. For more detailed pressure settings, visit this page.
Use Proper Cleaning Solutions When Necessary
While pressure alone works for many jobs, stubborn stains or moss require cleaning solutions. I made the mistake of skipping this step and only got surface dirt. Apply detergents or eco-friendly cleaning agents with a pump sprayer, then rinse thoroughly. Be sure to follow manufacturer instructions to avoid surface damage. For trusted cleaning products and techniques, see this article.
Final Rinse and Inspection
Always finish with a thorough rinse to remove any residual soap or dirt. Walk around your surface to inspect missed spots or streaks. I once rushed this step and had to go back, wasting time. A clean, even finish is the mark of a professional job. For tips on final touches, review this guide.
<>
Many DIY enthusiasts and homeowners jump into power washing with good intentions, but often, they fall prey to misconceptions that can undermine their efforts. Let’s dig deeper into some of the most common myths about power washing and reveal the nuanced truths that can elevate your results in 2024.
Why More Pressure Isn’t Always Better
One of the biggest misconceptions is that cranking up the pressure will automatically give you a cleaner surface. In reality, excessive pressure can damage delicate surfaces like wood, siding, or painted surfaces, leading to costly repairs. Instead, understanding the importance of adjusting your pressure based on the material is crucial. For instance, using a lower PSI with the right nozzle ensures you remove dirt without causing harm. For a comprehensive guide on optimal pressure settings, visit this resource.
Common Mistake: Overlooking Surface Preparation
Many overlook the significance of proper prep work, assuming power washing alone will do the job. Dirt, moss, or algae can hide in crevices or porous materials, making pre-treatment with suitable cleaning solutions essential. Applying eco-friendly detergents and letting them sit for a few minutes can loosen stubborn grime, resulting in a more thorough clean. Skipping this step often leads to incomplete results and the need for rework. Check out this article for expert tips on effective pre-treatment techniques.
Advanced Question: How do nozzle angles influence cleaning effectiveness?
Many beginners believe that the wider the spray, the better. However, nozzle angles play a critical role in controlling the force and coverage of your spray. A 15-degree nozzle delivers a concentrated, high-impact jet ideal for tough stains on concrete, whereas a 40-degree nozzle provides a softer spray suitable for siding or decks. Mastering nozzle selection can drastically improve your results and prevent damage. For detailed guidance, explore this expert guide.
Have you ever fallen into this trap? Let me know in the comments. Proper knowledge about pressure levels, surface prep, and nozzle choice can save you time, money, and headaches. Remember, the key to successful power washing isn’t just brute force but strategic technique and understanding the nuances involved. With these insights, you’re well on your way to professional-quality results every time.
Maintaining your power washing equipment is crucial for ensuring consistent, reliable results and extending the lifespan of your tools. Over time, even the most durable machines can suffer from wear and tear, leading to decreased performance and costly repairs. That’s why I prioritize regular upkeep and using the right tools for the job. One of my go-to strategies is to perform routine inspections of hoses, nozzles, and filters after each project. Checking for leaks or blockages helps prevent breakdowns and maintains optimal pressure levels. For equipment that’s been in use for a while, I recommend replacing worn-out nozzles with high-quality, adjustable spray patterns, which I personally find improve control and efficiency. To keep my pressure washer running smoothly, I also give it a thorough flush with clean water after each use, especially if I’ve used cleaning solutions or detergents. This prevents buildup inside the system and reduces corrosion risks. For more on selecting the best equipment and maintaining it properly, check out this detailed guide.
How do I maintain power washing tools over time?
Regular maintenance is the key to keeping your power washing tools in top shape. I set a monthly schedule to inspect all parts, apply lubrication to moving components, and replace any damaged hoses or filters. Using eco-friendly cleaning solutions also helps prevent buildup inside the machine, which can cause corrosion or clogs. Additionally, I recommend storing equipment in a dry, sheltered space to avoid exposure to the elements, which can accelerate wear. Investing in a maintenance kit that includes nozzles, O-rings, and filter replacements makes it easier to perform quick upgrades as needed. As trends evolve, more advanced machines now incorporate smart sensors that alert you when parts need servicing, which I believe will become standard in the near future. For now, sticking to a disciplined maintenance routine ensures your equipment will perform reliably project after project. For the best long-term results, I suggest exploring these expert maintenance tips.
Tools I recommend for lasting performance
From my experience, investing in high-quality nozzles like the Turbo Nozzle or adjustable spray guns significantly improves cleaning efficiency and reduces equipment strain. I personally prefer the top-rated models outlined here because of their durability and versatility. Additionally, a good detergent applicator makes pre-treatment easier, especially for stubborn stains or moss. I use a foam cannon attachment, which allows me to evenly distribute cleaning solutions without waste. For routine maintenance, a pressure washer pump protector is invaluable—by applying it monthly, I prevent corrosion and extend the life of my machine. Looking ahead, I predict that smart maintenance tools—like IoT-connected sensors—will become more widespread, making upkeep even simpler. In the meantime, sticking to proven equipment and maintenance routines will keep your power washer working reliably for years. For detailed equipment recommendations, visit this resource.