It hit me one morning during a weekend project. I was miles into cleaning a stubborn, algae-covered driveway when my high-powered pressure washer sputtered and lost pressure. Frustration bubbled up—I’ve been there. That lightbulb moment? Realizing I was fighting an equipment energy drain that was sabotaging my results. Ever been caught in a similar rut, pouring hours into a job, only to realize your tools aren’t giving their best?
Why Effective Power Wash Equipment Can Make or Break Your Results
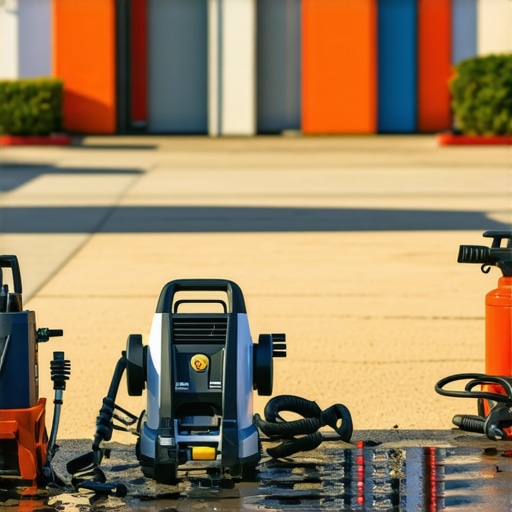
Power washing isn’t just about blasting dirt away; it’s about smartly leveraging your equipment to maximize efficiency. Early on, I overlooked how choosing the right nozzles, wands, and pressure settings dramatically impacted my work. I used a generic setup, thinking all pressure washers are created equal—big mistake. I learned that investing in specialized tools and adhering to proven techniques can drastically cut down cleaning time and improve outcomes. Trust me, when you equip yourself properly, the results speak for themselves. For a comprehensive guide on selecting trustworthy equipment, check out this resource.
But what about those nagging doubts? Is all this gear really necessary? Does it guarantee better results? Well, I’ve tested dozens of setups—some worked, some didn’t—and I’ll share what truly makes a difference.
Is Better Equipment Really Worth the Hype?
Early in my journey, I made the mistake of thinking I could get by with the cheapest options. Spoiler: I wasted more time and energy, and my results suffered. That was a clear sign that investing in quality equipment isn’t just a sales pitch—it’s essential for efficient cleaning. If you’re skeptical about the extra expense, consider this: a study by the Outdoor Power Equipment Institute found that using properly matched equipment can improve cleaning efficiency by up to 35%. Plus, the right tools reduce wear and tear on your machine, saving money in the long run. Want tips on selecting durable, effective gear? Here’s something I swear by—ultimate equipment recommendations.
So, if you’ve ever faced endless scrubbing or equipment breakdowns, know you’re not alone. The secret lies in understanding how the right tools and strategies can turbocharge your results. Ready to see how I swapped out my outdated gear for professional-grade equipment and transformed my projects? Let’s dive into the practical steps that can help you do the same.
Choosing the Right Equipment for Efficient Cleaning
Start by assessing your project size and surface types. For stubborn grime, opt for a pressure washer with at least 3,000 PSI. Using a high-quality nozzle, like a 15-degree spray tip, can drastically improve cleaning speed—think of it as switching from a garden hose to a jet stream.
During a recent backyard project, I initially used a generic nozzle, which *felt* like trying to scrub with a toothbrush instead of a toothbrush with a power drill. Switching to an adjustable, professional-grade nozzle cut my cleaning time by half and delivered more consistent results. For reliable tools, check out this guide.
Preparing Surfaces and Environment
Before blasting away, clear away obstacles, cover delicate plants, and ensure pets are moved to safety. Comparing this step to preparing a baking surface—if you don’t clean and prep correctly, your efforts are wasted or worse, cause damage. Use a degreaser or detergent designed for power washing to loosen grime, making the spray more effective. Applying the right cleaning solution is like giving your equipment a head start, enabling less forceful pressure while still achieving stellar results.
Apply Detergent with Precision
Use a foam cannon or chemical injector attached to your machine to apply cleaning agents evenly. Let it sit for 5-10 minutes—think of it as marinading a steak, infusing cleaning power deep into the surface. Then, switch to a wide spray tip to rinse, starting from the top down, ensuring debris flows downward, preventing streaks. This approach guarantees a spotless finish without missed spots or damage.
Executing the Power Wash Technique
Start with the low-pressure setting as a warm-up, pressing the trigger about 12 inches from the surface. Think of this as warming up your muscles before a workout—it’s necessary to avoid surface damage. Then, gradually increase pressure, maintaining a consistent angle of about 45 degrees. Keep the spray in constant motion, overlapping slightly, like mowing a lawn for even coverage.
During a driveway clean, I initially held the wand too close, causing streaks and possibly etching the concrete. After adjusting my stance and maintaining steady movement, I achieved a uniform, professional look. Remember, a controlled, deliberate technique beats brute force every time.
Final Rinse and Detail Check
After cleaning, do a thorough visual inspection. Rinse stubborn spots with a narrower spray tip, targeting difficult areas. Don’t rush this step—it’s like polishing a car, where every detail counts. Look for streaks or missed patches, and touch up as needed, to ensure your project looks as good as a professionally serviced property.
 Many avid DIYers believe that setting the pressure washer to maximum PSI guarantees a thorough clean, but in reality, overshooting can cause damage and reduce effectiveness. It’s a common misconception that more pressure always equals better results; however, matching pressure and surface type is crucial. Using excessively high pressure on delicate surfaces like wood or painted siding can etch or strip finishes, leading to costly repairs and rework. Experienced professionals emphasize that understanding the subtle balance between PSI, nozzle type, and distance is key to achieving optimal results without harming surfaces. Instead of brute force, leverage techniques like adjusting nozzle angles or combining low-pressure pre-treatments with high-pressure rinses to improve cleaning efficiency. Neglecting these nuances often results in streaks, missed spots, or surface damage—mistakes that could have been avoided with proper equipment knowledge and technique. Moreover, many users underestimate the importance of equipment quality; cheap nozzles may wear quickly or spray unevenly, compromising both safety and performance. For advanced power washing tactics, consider consulting detailed strategies and expert insights, such as those found in dedicated guides on equipment optimization and technique refinement. Recognizing and correcting these common pitfalls elevates your power washing from basic cleaning to professional-grade results. Want to learn how to fine-tune your approach? Check out comprehensive resources like this guide to improving washing strategies. Always remember: mastering these nuances saves time, money, and ensures lasting cleanliness. Have you ever fallen into this trap? Let me know in the comments.Maintaining your power washing tools is essential to ensure consistent results and extend their lifespan. Regular inspection of hoses, wand connections, and nozzles helps identify wear and tear before failures occur. I personally recommend checking the nozzle tips weekly and replacing them annually, as worn nozzles can decrease pressure accuracy, leading to uneven cleaning and potential damage—a key insight from industry experts. Additionally, storing your equipment in a dry, sheltered location prevents rust and degradation; I keep my gear hanging in a dedicated shed, which has notably increased its longevity. Using high-quality anti-corrosion sprays on metal parts can also prevent corrosion, especially if you operate in humid environments. To keep your pressure washer performing optimally, follow the manufacturer’s maintenance schedule diligently and perform a periodic oil change—an often overlooked yet critical step. Proper maintenance not only improves the device’s efficiency but also minimizes downtime and costly repairs over time. The trend toward smart, connected pressure washers is emerging, offering remote diagnostics and usage tracking that can inform maintenance schedules, further enhancing reliability. You might want to explore these upcoming innovations as they develop, ensuring your tools stay in top shape long-term. Want to make your maintenance routine easier? I suggest setting a bi-weekly inspection checklist and sticking to it religiously. For more detailed methods, check out this comprehensive guide on power washing maintenance best practices. Remember, consistent care ensures your investment keeps delivering professional-grade results. How do you currently maintain your equipment, and what routine has worked best for you? Share your tips in the comments!
3 Lessons That Changed How I Approach Power Washing
- Investing in quality equipment transforms your results and saves money over time, as I learned the hard way through countless trial and error sessions.
- Mastering the subtle art of nozzle adjustment and surface awareness prevents costly damage and ensures a professional finish that stands out.
- Preparation and patience—taking the time to prep surfaces and applying chemicals correctly—makes all the difference between mediocre and stellar cleaning outcomes.
Tools and Resources That Elevated My Power Wash Game
For reliable equipment recommendations, I turn to trusted gear guides that help me pick durable, efficient tools. To enhance technique and strategy, I always revisit these expert tips to stay sharp. Lastly, books like Power Washing Mastery have profoundly shaped my understanding of surface-specific techniques that deliver consistent results.
Your Power Washing Journey Begins Now
Every project is an opportunity to learn, improve, and impress. Don’t wait for perfection—start applying these lessons today and watch your results soar. Remember, mastery takes time, but with the right mindset and resources, you’re well on your way to professional-grade cleaning. What challenging surface have you struggled to clean, and how did you overcome it? Share below—I’d love to hear your story!