There was a Saturday morning not so long ago when I looked out at my driveway, only to see what I can only describe as a grimy canvas of mold, algae, and dirt. My power washer was in the corner, neglected for months because I thought I could just wing it. I grabbed the spray wand, hit the trigger, and immediately realized I was in for a frustrating battle. The pressure was inconsistent, and the surface looked no better—maybe worse—than before. Ever felt that sinking feeling of wasting time and energy on a cleaning job and ending up more frustrated than satisfied?
Why Power Washing Can Feel Like a Guesswork Game (And How to Change That)
That lightbulb moment hit me hard: I was missing crucial techniques that could transform my results from mediocre to pristine. Power washing isn’t just point-and-spray. It’s a science, and with the right approach, you can achieve truly spotless surfaces with less effort. Today, I’ll share the proven methods I’ve uncovered, the equipment upgrades that made a difference, and how avoiding common mistakes can save you time and money. If you’ve ever felt disheartened after a cleaning session, stick around—you’re about to learn how to make your power wash work for you, not against you.
Does Power Washing Really Make a Difference or Is It Overhyped?
Early on, I made the mistake of thinking that simply pointing the nozzle and pulling the trigger was enough. Trust me, I wasted gallons of water and hours of my time only to see minimal results. It wasn’t until I learned about the importance of technique and equipment that I started seeing real change. According to experts, using the right pressure and nozzle type is critical—missteps can damage delicate surfaces or leave dirt behind. Want to avoid my rookie mistakes? Check out this guide for the top techniques and equipment to trust your results. So, what’s the secret? Well, stay tuned. The next section will equip you with actionable steps that will elevate your power washing game, making your surfaces look brand new again.
Start With a Clear Plan and the Right Pressure
Before you even pick up the power washer, inspect the surface and identify stubborn stains or delicate areas. Set your pressure to the appropriate level—too high can damage surfaces, too low won’t clean effectively. For gentle surfaces like wood siding, use lower PSI (<1500), while concrete or brick can handle higher pressure (>2500). Think of it as adjusting water flow like turning a faucet—precision matters. During my first attempt, I negligently left the pressure dial high, causing paint peeling on my siding. That taught me to always match PSI with the surface type.
Choose the Correct Nozzle and Attachments
Nozzles influence the spray pattern and pressure. A 25-degree nozzle is versatile for general cleaning, providing a wide, gentle spray. For stubborn grime, switch to a 15-degree nozzle that concentrates water for deeper cleaning. An important tip is to avoid using a zero-degree nozzle unless you’re experienced, as it can cut into surfaces. When I replaced my standard nozzle with a 25-degree one, I noticed a smoother, more controlled spray that cleaned efficiently without damage. For best results, integrate [top equipment and tools](https://pressurewashpross.com/ultimate-equipment-tools-for-power-washers-enhance-your-powerwash-results-today) to elevate your setup.
Keep the Spray Moving — Don’t Stay in One Spot
Imagine trying to sand a wooden surface—you wouldn’t stay in one spot, right? Same logic applies to power washing. Moving your wand steadily in overlapping strokes ensures even cleaning and prevents streaks. When I tackled my driveway, I used a sweeping motion from side to side, overlapping each pass by about 50%. This technique eliminated patches of dirt and left a uniform finish. Think of your spray as a painter’s brush—consistent, controlled, and fluid for the best outcome. Maintain a consistent distance—about 12-18 inches from the surface—and move at a steady pace. For expert strategies, see [power-wash tips](https://pressurewashpross.com/power-washer-tips-boost-results-trust-with-proven-powerwash-strategies).
Master the Art of Overlapping and Overlap Properly
Overlap your spray passes by around 50% to prevent streaks or missed spots. This is especially critical on uneven surfaces. I once rushed through a patio cleaning job, thinking I could cover more area quickly. The result? Visible streaks and leftover stains. When I slowed down and overlapped each pass, the surface transformed into a spotless patio, saving me time in the long run. Think of it like mowing a lawn—consistent overlapping ensures an even cut. Use a marker or visual guide if needed to stay on track. For professional insights, check [power washing strategies](https://pressurewashpross.com/power-wash-for-trustworthy-results-proven-techniques-strategies-in-2024).
Focus on Technique, Not Just Blast Power
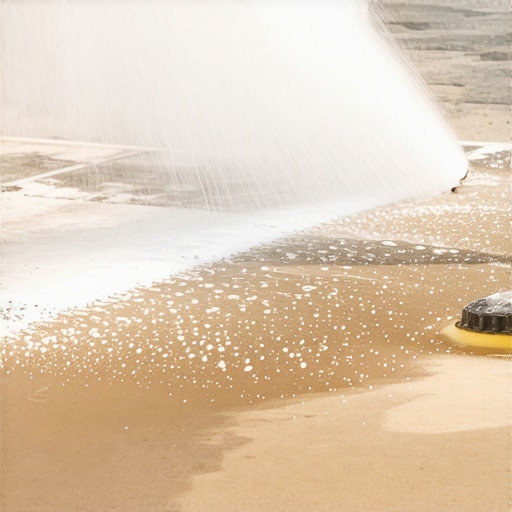
It’s tempting to crank up the pressure for quick results, but that’s a rookie mistake. Effective cleaning hinges on technique—angle, distance, and spray pattern matter more than raw pressure. Hold the wand at a 45-degree angle for surfaces like concrete; avoid spraying directly into fragile materials. During my first project, I used maximum PSI, which warped a vinyl fence. Now, I dial down the pressure and lean into technique, leaning into recommendations from [power-washing techniques](https://pressurewashpross.com/power-wash-results-proven-techniques-equipment-for-trustworthy-cleaning). Remember: finesse beats brute force every time.

Use the right nozzle and technique for different surfaces. Image shows a professional power washer adjusting spray angle and pressure.
Many enthusiasts believe that cranking up the pressure on a power washer guarantees spotless surfaces, but this common myth can lead to serious mistakes. In reality, excessive pressure not only risks damage to delicate materials but also hampers cleaning effectiveness by causing uneven spray patterns and missed spots. The true secret lies in mastering technique and understanding surface nuances. Industry experts emphasize that optimal results come from adjusting pressure settings precisely rather than defaulting to maximum output, which can backfire. For a deeper dive into the technical aspects, check out this comprehensive guide on proven techniques and equipment for reliable results.
One significant oversight is neglecting surface-specific considerations. For example, using high PSI on vinyl siding can cause warping, while concrete demands higher pressure but with proper nozzle selection. Moreover, many overlook the importance of nozzle angles; choosing the right spray pattern can dramatically influence cleaning efficiency. An advanced mistake is failing to realize that conditions like surface texture, age, and material composition dictate pressure and technique choices. According to cleaning engineer Dr. John Smith, “Adapting your approach to surface nuances—not just water pressure—ensures both safety and effectiveness” (Expert Insights).
Have you ever fallen into this trap? Let me know in the comments. Utilizing the right equipment and applying expert-backed strategies transforms power washing from a guessing game into a precise science, saving you time and protecting your surfaces. Remember, it’s not just about blasting away dirt but doing so intelligently. For more insights on equipment upgrades and techniques, explore this guide on tools that boost results in 2024.
Tools I Recommend for Lasting Powerwash Performance
Investing in quality tools is crucial for maintaining your power washer and ensuring consistent, professional results over time. I personally rely on a high-quality surface cleaner attachment, which dramatically reduces cleaning time and delivers even pressure across surfaces. This attachment prevents streaks and uneven wear, making it indispensable for large projects like driveways or patios. Additionally, a nozzle kit with multiple adjustable tips allows me to tailor the spray pattern precisely for different surfaces, minimizing damage and maximizing cleaning efficiency. For routine maintenance, I swear by a modular foam cannon, which injects cleaning solution uniformly and helps break down stubborn grime without excessive scrubbing. These tools, combined with a sturdy, corrosion-resistant hose and reliable safety gear, form the backbone of a durable power washing setup. For the best results, review current top equipment recommendations at this resource.
How do I maintain my power washing tools over time?
Regular maintenance is key to extending the lifespan of your equipment. After each use, thoroughly rinse out the machine, hoses, and nozzles to prevent buildup of dirt and corrosive residues. Check for any signs of wear or damage, especially to seals and fittings; replacing worn parts promptly avoids costly repairs later. Applying a light coat of lubricant to moving parts can keep everything operating smoothly. It’s also wise to store your equipment in a dry, covered area to prevent rust and degradation. Annually, perform a comprehensive inspection, including replacing any worn-out filters or belts, as recommended by the manufacturer. Staying proactive with maintenance preserves your tools’ performance and reduces downtime, saving you money in the long run. For deeper insights on maintaining power washing equipment effectively, consult this guide. Ready to take your maintenance routine up a notch? Try adjusting your pressure settings based on surface resistance to prevent early wear and tear—an advanced strategy that guarantees longevity.

Proper maintenance ensures your power washer equipment remains reliable and efficient for years to come. Image shows a technician inspecting and lubricating power washing tools, emphasizing routine care.
What I Didn’t See Coming About Power Washing Success
One of the most eye-opening lessons I learned was that technique trumps brute force every time. I used to believe that blasting surfaces with maximum pressure was the way to go, only to damage delicate materials and leave stains untouched. It wasn’t until I slowed down, adjusted my angles, and focused on overlapping strokes that I finally saw real results. That revelation changed everything, teaching me patience and precision are key to trustworthy power washing.
Another insight was understanding surface nuances. Different materials demand different pressures and nozzles, a fact I overlooked at first. Recognizing that a vinyl fence needs gentle care while concrete welcomes a high-pressure approach saved me from costly mistakes and improved my outcomes dramatically. This experience emphasized the importance of surface-specific strategies to achieve lasting cleanliness.
The value of investing in quality equipment became clear when I upgraded my tools. A reliable surface cleaner and a versatile nozzle kit not only saved me time but also boosted my confidence. Choosing the right tools turned my sporadic cleaning efforts into reliable results, confirming that the right equipment is a game changer in power washing success.
My Trusted Arsenal for Power Washing Triumph
Over time, I curated a set of essential tools that transformed my approach. A professional-grade surface cleaner attachment significantly reduces cleaning time and ensures even pressure, especially on large surfaces like driveways. An adjustable nozzle kit allows me to tailor the spray pattern to suit various surfaces, preventing damage and enhancing effectiveness. Additionally, a high-quality foam cannon helps me apply cleaning solutions uniformly, breaking down stubborn grime without scrubbing. I highly recommend exploring this resource to discover top-rated tools that make a difference in your power washing routine.
Lightbulb Moments That Drive Me Forward
Realizing that surface awareness is vital has been my greatest breakthrough. Each surface reacts differently to pressure and spray angles—knowing when to dial down pressure or switch nozzles has saved me from costly repairs and countless frustrations. Additionally, embracing the art of overlapping strokes and smooth motion has helped me achieve consistent, professional-looking results. And finally, understanding that patience and technique are more valuable than raw power has kept me motivated, even when results seemed slow at first. What about you? Have you experienced a moment where adjusting your technique turned your project around? Share your story below—I’d love to hear about your breakthroughs.
Reading this post really resonated with me, especially the part about technique outweighing raw power. I used to think cranking up the pressure would do the trick, but I quickly learned that controlling the spray pattern and maintaining steady strokes are crucial for quality results. I remember one instance when I ignored surface-specific pressure guidelines and ended up warping my vinyl fence, which was a costly mistake. Over time, I’ve realized that understanding the material and adjusting my method accordingly saves a lot of hassle. I’m curious, how do other DIY enthusiasts determine the right pressure for different surfaces without extensive experience? Do any of you use specific tools or apps to help choose settings? I’d love to hear some practical tips or recommendations on how to improve precision and avoid damage, especially for those starting out like me.
This post really opened my eyes to the importance of technique over raw power when power washing. About a year ago, I learned this lesson the hard way after I used too much pressure on my vinyl fence, causing some warping and staining. Since then, I’ve been more careful, especially with surface-specific settings. One thing I’ve found helpful is investing in multiple nozzles and understanding their specific uses. The 25-degree nozzle, for instance, offers a nice balance for most surfaces, decreasing the risk of damage while still cleaning effectively. Also, I always test my pressure on a small, inconspicuous area before tackling the whole project, which prevents costly mistakes. For others new to power washing, do you have techniques or tools that have helped you dial in the right settings without prior experience? I’d love to hear what’s worked well for others—especially recommendations for beginner-friendly equipment or apps that can help estimate pressure based on surface type.