I remember the first time I finished a thorough power wash on my driveway, feeling proud and ready to admire that spotless shine. But then, just a few days later, I noticed those stubborn stains creeping back, and my surface looked duller than I remembered. That lightbulb moment made me realize—cleaning isn’t the finish line. Protecting your surfaces after a power wash is just as crucial, and that’s where the right sealants come into play.
Why Post-Power Washing Sealants Make All the Difference
Applying the proper sealant isn’t just about making things look good; it’s about prolonging the clean and preventing damage from the elements. After my initial slip-ups, I started exploring the latest sealants designed specifically for post-wash protection—which leads me to the five new sealants in 2026 that really stand out. These products promise to keep surfaces cleaner longer, resist stains, and offer a durable barrier against weathering. But are they worth the hype? That’s the question I want to answer today, sharing insights from my experience and others’ to ensure your next project is a lasting success.
Is All Sealant Created Equal? My Early Mistake Highlighted
Early on, I made the mistake of using a generic sealant without considering the specific surface or washing conditions. I learned the hard way that not all sealants are suitable for every material, leading to uneven coverage or even damage. To avoid this, I now carefully select products tailored to my surfaces, like those discussed in the ultimate guide to sealant choices. If you’ve faced similar frustrations or doubts, don’t worry—this comprehensive look at 2026’s top sealants will help you make the best decision for your project.
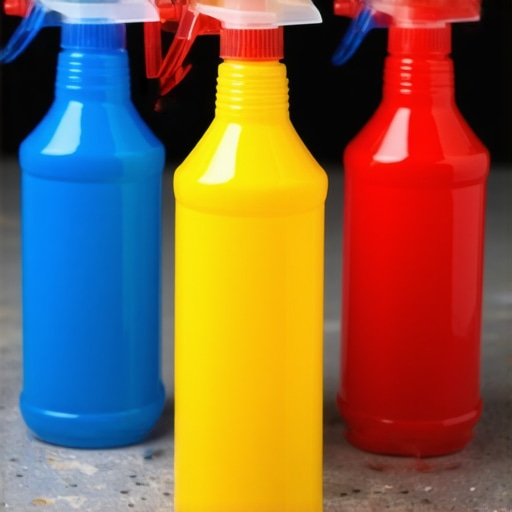
Select the Right Sealant for Your Surface
Start by evaluating the material you’ve just cleaned. Different surfaces require specific sealants — for example, concrete, wood, or brick each need tailored products to ensure optimal protection. I once tried applying a general-purpose sealer on my wooden deck, which resulted in uneven coverage and an unsightly finish. To avoid this, I now refer to trusted sources like this guide for choosing appropriate sealants. Make sure to select products labeled for post-wash use, resistant to UV rays, and capable of preventing stains and water penetration.
Prepare Surfaces Before Applying Sealant
Ensure the surface is thoroughly dry and free from residual dirt or cleaning solution. I’ve learned the hard way that applying sealant on a damp or dusty surface undermines adhesion, leading to premature peeling. Use a leaf blower or allow ample drying time after washing—usually 24 hours for concrete and up to 48 hours for wood, depending on weather. For optimal results, revisit top techniques for surface preparation. Remember, a clean, dry base is critical for the sealant to form a durable barrier.
Apply Sealant Evenly and Correctly
Use a sprayer with adjustable pressure and a wide spray tip to distribute the sealant uniformly. I once attempted a quick roll-on method and ended up with patchy coverage—leaving some areas vulnerable. To avoid this, follow manufacturer instructions regarding application thickness and drying times. Keep your spray at a consistent distance—about 12 inches from the surface—and overlap passes slightly. Think of it like painting a wall: steady, even strokes produce the best finish. Also, consider applying sealant on a mild day; high humidity or wind can compromise application quality. For tools, check out top equipment guides to optimize your setup.
Layering and Curing the Sealant
Applying multiple thin layers rather than one thick coat enhances durability. I made this mistake once—thinking more product meant better protection—but it resulted in bubbling. After the first layer dries as per instructions (usually 2-4 hours), lightly sand the surface with fine-grit sandpaper to remove imperfections before the second coat. Allow the final layer to cure fully—this can take 24 to 72 hours depending on product specifications. Patience here pays off; rushing the curing process can weaken the sealant, rendering it ineffective against elements. For further insights, review best practices for sealing success.
Maintain and Reapply as Needed
Schedule regular inspections—after heavy rains or storms—and clean any debris or moss that may compromise the sealant’s integrity. I noticed my driveway’s surface started to look dull again after six months, prompting me to reapply the sealant in targeted areas. Using a spray or roller, I touched up those spots, extending the surface’s life. Remember, sealants aren’t one-and-done solutions; ongoing maintenance ensures your surfaces stay protected longer. This approach is key to maximizing your investment in power washing and sealing efforts, helping surfaces resist stains, mold, and weather damage over time.Many DIY enthusiasts and even some professionals believe that simply aiming high with PSI and using the largest nozzle will deliver the best cleaning results. However, this misconception can lead to damaging surfaces or achieving subpar results. The truth is, effective power washing requires a nuanced understanding of pressure settings, surfacing materials, and technique. For example, applying high PSI on delicate surfaces like softwood decks or painted sidings often results in stripping paint or gouging wood. Instead, focusing on appropriate pressure and nozzle choices—such as the use of lower pressure with pinpoint nozzles—ensures thorough cleaning without harm. Entrenched myths like ‘more pressure equals cleaner’ overlook how factors like spray pattern, distance, and cleaning agents play critical roles. Advanced power washing involves mastering equipment settings, understanding surface sensitivities, and employing proper techniques. Experts emphasize that a well-balanced approach prevents common mistakes, such as overuse of detergents or aggressive spray angles, which can weaken surface integrity over time. A notable study by the Power Equipment Institute highlights that improper technique is a leading cause of surface damage during cleaning. Recognize that the power washer is a tool, not a weapon—its effectiveness depends on skill and knowledge. Have you ever fallen into this trap? Let me know in the comments.
Keep It Running: Tools I Recommend for Power Washing
Maintaining your power washer isn’t just about occasional checks; it’s about building a routine that prolongs its lifespan and ensures top performance. I personally swear by high-quality accessories like a durable lance and a adjustable pressure nozzle, which give me precise control over cleaning different surfaces without risking damage. For example, my favorite pressure nozzle allows me to switch seamlessly between soft wash and aggressive cleaning, saving time and protecting delicate surfaces.
Another tool I find indispensable is a set of maintenance brushes and cleaning solvents designed for pumps and seals. Regularly cleaning these components prevents buildup that can cause pressure drops or leaks, especially during long sessions. I also recommend investing in a water filter system to keep grit and debris out of your machine. This simple addition can dramatically boost your washer’s efficiency and lifespan.
Preparing for Long-Term Success
Beyond the initial setup, routine checks are vital. I schedule weekly inspections, especially before major projects, verifying that hoses are intact, nozzles are clear, and gauges are functioning correctly. For troubleshooting and detailed maintenance routines, I consult expert guides like top techniques. Staying proactive helps prevent unexpected breakdowns, saving time and expensive repairs down the line.
Scaling Up Power Washing Tasks Efficiently
As your skills grow, so does your equipment need. Upgrading to a higher-capacity pump or a commercial-grade wand can exponentially increase your coverage rate. I personally upgraded my setup with a heavy-duty extension wand, which has cut my cleaning time in half for large surfaces like decks and driveways. Additionally, adopting accessories like quick-connect fittings reduces setup time and allows quick swaps between tasks.
How do I maintain my power washer over time?
Consistent maintenance, including flushing the system after every use, lubricating moving parts, and replacing worn-out seals, can extend your equipment’s life significantly. For example, according to technical standards outlined by industry experts, using manufacturer-approved oils and lubricants prevents corrosion and ensures smooth operation. Don’t forget to store your machine in a clean, dry space and winterize it properly if you live in a climate with freezing temperatures. Regularly checking these details can prevent costly repairs and keep your power washer ready whenever you need it.
If you haven’t already, try incorporating a routine water filter into your setup and see how much smoother your power washing becomes. It’s a small upgrade with big long-term benefits that can save you from unexpected downtime. Ready to take your power washing to the next level? Head over to this equipment guide and get the best tools suited for your needs today.

The Hardest Lesson I Learned About powerwash,power washing,power washer
One of my biggest realizations was that rushing the process or skipping surface prep often led to disappointing results. I once tried to save time by applying sealant immediately after washing without ensuring complete dryness, which caused bubbling and uneven protection. This taught me that patience and attention to detail—like waiting for surfaces to dry thoroughly—are essential to lasting powerwashing outcomes. Another lesson was understanding that not all equipment settings suit every surface; aggressive spray angles damaged my softwood decks initially, highlighting the importance of customizing my approach based on material.
3 Myths About powerwash,power washing,power washer That Held Me Back
For a while, I believed the myth that higher PSI always equals better cleaning, which sometimes resulted in surface damage. I also thought using the largest nozzle would cover more area faster, but it often led to uneven results. Lastly, I assumed that applying the same sealant across different surfaces was effective — until I saw how tailored products performed much better, especially on delicate materials. Dispelling these misconceptions was pivotal in elevating my power washing game and ensuring longer-lasting, damage-free results.
What Experts Won’t Tell You About powerwash,power washing,power washer
One key insight I picked up from seasoned professionals is the significance of surface-specific prep and finishing touches. Experts emphasize that surface cleaning isn’t just about PSI but also about technique—maintaining the right distance, spray angle, and using the correct nozzle makes all the difference. They also advise regular maintenance of equipment to prevent breakdowns that could compromise projects. Interestingly, top professionals often recommend investing in quality accessories like adjustable nozzles and filters, which I’ve found greatly improve efficiency and results. These behind-the-scenes tips have transformed the way I approach power washing, saving me time and preventing costly mistakes.
My Essential Toolkit for powerwash,power washing,power washer
Over time, I’ve come to trust a set of tools that make each project easier and more effective. My favorite pressure nozzle allows me to switch effortlessly between gentle washes and deep cleaning, which is vital for delicate surfaces. I also rely on a durable lance and quick-connect fittings that save setup time and improve maneuverability. Cleaning solvents designed for my pump components help avoid pressure drops, extending lifespan. For surface-specific needs, I keep a variety of soft brushes and eco-friendly cleaning agents, making sure I’m always prepared for any scenario. These tools have become my trusted companions in delivering consistent, professional results.
Where to Go from Here
If you’re serious about elevating your power washing skills, start by assessing your current setup and adapting your techniques—small adjustments can lead to big improvements. Don’t forget to revisit surface preparation and apply the right sealant in thin, even layers, allowing proper curing. Regular maintenance and equipment upgrades, like a heavy-duty extension wand, will greatly increase your efficiency. To deepen your knowledge, explore detailed guides on common mistakes and expert techniques. Remember, mastery is a journey, and every project is an opportunity to learn and refine your craft—power washing isn’t just about cleaning; it’s about protecting and enhancing your home’s beauty for years to come. Ready to take your power washing to the next level? Let me know in the comments which lesson resonated most or where you’re planning to focus your efforts next.