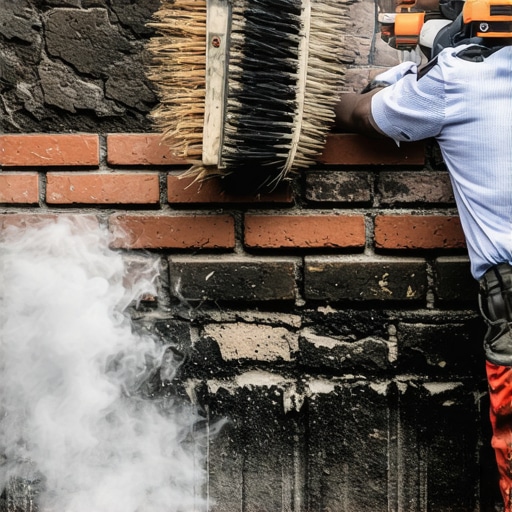
I’ll never forget the first time I blasted away at a brick surface, thinking I was making quick work of the grime. Instead, I watched in horror as chunks of mortar started flying off, revealing more damage than I ever anticipated. That lightbulb moment hit hard—that relentless power washing could actually ruin the very surfaces I was trying to clean. It was a frustrating lesson that many DIY enthusiasts and pros alike learn the hard way.
Why Power Washing Can Turn Into a Money Pit
This experience led me down a rabbit hole of research and trial-and-error. I quickly realized that there’s a fine line between a sparkling clean facade and costly repairs. In fact, improper power washing is responsible for thousands of dollars in damage annually, especially on delicate brickwork. Knowing when and how to use the right techniques makes all the difference. With new regulations and advanced cleaning methods emerging by 2026, staying ahead of the curve is more critical than ever. If you’ve faced the struggle of uneven results or accidental damage, you’re not alone—and I promise, there’s a better way.
Is Power Washing a Risk Worth Taking?
Early on, I made the mistake of trusting high-pressure settings without understanding the surface implications. That mistake cost me not just time, but significant repair costs. I’ve since learned that the key isn’t just having the hottest equipment, but knowing the right techniques. Curious if your current method is doing more harm than good? The good news is, by mastering the correct approach, you can protect your surfaces and boost your results. Want to discover how to take control of your pressure washing and avoid common pitfalls? Keep reading, and I’ll show you exactly what to do.
According to industry experts, using the proper equipment and techniques can significantly reduce surface damage and increase cleaning efficiency. For example, exploring [effective power washer equipment](https://pressurewashpross.com/effective-power-washer-equipment-boost-your-cleaning-efficiency-in-2024) can elevate your results without risking costly repairs. As the 2026 regulations tighten, understanding these nuances isn’t just a tip—it’s a necessity.
Now, let’s dive into the core principles that will help you clean smarter, safer, and more effectively, starting today.
.
Select the Right Equipment for Your Job
The foundation of successful power washing starts with choosing equipment suited to your specific project. During my early days, I underestimated this step, which led to uneven cleaning and surface damage. I recommend exploring [effective power washer equipment](https://pressurewashpross.com/effective-power-washer-equipment-boost-your-cleaning-efficiency-in-2024) to understand what tools best match your needs. For instance, a variable pressure machine allows you to adjust settings precisely, giving you control over gentle or aggressive cleaning depending on the surface.
Pick Nozzles Carefully
Nozzles determine the spray pattern and pressure. Using the wrong one is like trying to cut steak with a butter knife—ineffective and potentially damaging. I once tried cleaning my brick patio with a narrow-angle nozzle, thinking it would speed up the process. Instead, I created streaks and mortar chips. To prevent this, always select a nozzle appropriate for the surface. For siding, a wider spray (like a 25 or 40-degree nozzle) minimizes risk. Check out [top equipment tools for power washing](https://pressurewashpross.com/top-equipment-tools-for-power-washing-maximize-efficiency-in-2024) to find reliable options.
Master Proper Technique
Technique is everything in power washing. Think of your spray like a gentle rain evenly falling across your surface rather than a fire hose blasting in one spot. When I cleaned my driveway, I used a slow, sweeping motion, maintaining a consistent distance—around 18 inches from the surface. Moving too fast or too close can cause streaks or embed debris into the surface, especially on delicate materials. For deeper insights, review [power washing techniques](https://pressurewashpross.com/power-washing-techniques-effective-strategies-for-2024-success-2), which emphasize overlapping passes and variable pressure adjustment.
Adjust Your Pressure Settings
No two surfaces are the same. Brick, vinyl, wood, and concrete each require different pressures. A high setting might be perfect for concrete but ruin delicate siding. I learned this firsthand when over-pressurized my siding, causing pitting. Always start with a lower pressure and gradually increase if needed. Use the [4-power washer settings](https://pressurewashpross.com/4-power-washer-settings-to-clean-siding-without-damage-2026) as a benchmark for safe adjustments, ensuring you avoid costly surface damage while maximizing cleaning power.
Apply Cleaning Solutions When Needed
Sometimes, pressure alone isn’t enough. Using biodegradable detergents or degreasers can loosen stubborn grime, reducing the need for brute force. I remember coating my garage door with a degreaser before power washing, which made removal much easier and safer. Always follow manufacturer instructions and apply solutions with a pump sprayer before rinsing with your power washer. For tailored advice, visit [effective power washer tips](https://pressurewashpross.com/effective-power-washer-tips-for-lasting-results-confidence-in-2024) to learn which cleaners are most compatible with different surfaces.
Focus on Proper Technique During the Finish
The end of your cleaning process is just as critical. Overlapping passes and maintaining consistent distance prevent uneven patches or streaks. I once finished cleaning my fence in a rush, resulting in visible lines. A second, careful pass, following these principles, left a uniform, streak-free finish. For tips on stopping streaks, see [stop leaving ugly streaks](https://pressurewashpross.com/stop-leaving-ugly-streaks-the-2026-trick-for-a-clean-driveway). Remember, patience and consistency are your best allies for pristine results.
While many believe that owning the right power washer and cranking up the pressure will guarantee pristine results, the truth is far more nuanced. A common myth is that higher PSI always means cleaner surfaces; however, applying excessive pressure can cause irreversible damage, especially to delicate materials like brick or vinyl siding. Experts emphasize that understanding the specific requirements of each surface—and tailoring your approach accordingly—is crucial for effective and safe cleaning. Relying solely on brute force not only risks surface damage but can also lead to the false assumption that you need more powerful equipment, which isn’t always the case. Instead, selecting the appropriate effective power washer equipment tailored for your project can make all the difference. Additionally, many overlook that proper technique, such as correct nozzle choice and maintaining optimal distances, is just as vital as equipment. Using narrow-angle nozzles may seem efficient, but they concentrate pressure and can create streaks or mortar chips on brickwork. Instead, exploring power washer tips for effective power washing helps prevent these pitfalls.
Are You Falling for the Pressure Myth?
One advanced mistake many make involves focusing exclusively on PSI ratings without considering flow rate and surface compatibility. Higher PSI combined with low flow may be ineffective, while moderate PSI with high flow can produce better results with less risk. Industry experts recommend paying attention to cleaning units (CUs)—a combination of PSI and GPM—to optimize performance without damaging surfaces. Knowing how to balance pressure and flow requires a deeper understanding of the equipment, and that’s where strategic use of power washing tools and techniques becomes essential. “Misjudging these factors” can turn a straightforward cleaning into costly repairs, highlighting the importance of mastering the nuances beyond generic advice.
Furthermore, a prevalent oversight involves neglecting surface-specific cleaning techniques. For instance, concrete responds well to high pressure, while soft wood or stained surfaces demand lower settings. Failing to recognize these differences can result in peeling paint, wood shavings, or surface etching. To avoid this, I recommend reviewing power washing techniques tailored for various surfaces. Mastering these advanced nuances ultimately elevates your cleaning from average to expert level.
Have you ever fallen into this trap? Let me know in the comments and share your experience. Remember, the key to power washing success isn’t just gear—it’s understanding the subtle details that protect your surfaces and ensure top-tier results.
Keep Your Power Washer in Top Shape for Long-Term Results
Investing in quality equipment is just the beginning; regular maintenance is essential to ensure your power washer stays effective and safe over time. From changing oil and inspecting hoses to cleaning filters, these routine tasks prevent breakdowns and extend the lifespan of your tools.
For example, I personally make it a habit to rinse the system thoroughly after each use, especially if I’ve been working with detergents or dirty water. This simple step minimizes mineral buildup and prevents clogs. Additionally, I always check for leaks and wear on hoses, replacing any cracked or worn parts immediately. Consistent maintenance not only saves money in repairs but also guarantees optimal performance whenever I need it.
Why Regular Checks Are Critical
Overlooking maintenance can lead to decreased PSI, flow issues, or even pump failure. Industry experts recommend inspecting and replacing parts like nozzles, filters, and seals every few months, depending on usage. Staying proactive ensures your equipment operates at peak efficiency, conserving time and energy during your cleaning sessions. Want to see how I personally keep my gear running smoothly? Visit this guide for detailed maintenance routines.
Tools I Trust for Reliability and Performance
Choosing the right accessories makes all the difference. I prefer adjustable pressure nozzles and quick-connect hoses, which save setup time and allow me to tailor the spray to each surface. For instance, I swear by the variable pressure models because they offer precise control, minimizing surface damage. Moreover, a durable extension wand helps reach high areas without risking safety or stability.
To maximize efficiency, I also use a quality surface cleaner attachment when cleaning large concrete areas. These tools distribute water evenly, cutting cleaning time by half and preventing streaks. For professional-grade solutions, I rely on reputable brands highlighted in industry reviews—this way, I avoid cheap replacements that may compromise results or durability.
How do I maintain my tools over time?
Keeping tools functional involves more than just initial investment. Rinsing attachments after each use, storing them in a dry place, and replacing worn parts proactively prolong their life. In fact, according to this resource, implementing a regular maintenance schedule can double the lifespan of your equipment. Try scheduling monthly checks and applying a light lubricant to moving parts to prevent rust and corrosion. These small steps make a big difference and ensure your power washing gear is always ready for the task ahead.
If you haven’t already, I recommend trying the advanced nozzle adjustment techniques I mentioned earlier. Fine-tuning your spray can save you time, reduce surface damage, and produce more uniform results. Regular maintenance and using reliable tools not only improve immediate outcomes but also set you up for long-term success in your cleaning projects!
Three Surprising Truths I Discovered About Power Washing
One of the most eye-opening lessons I learned was that more pressure doesn’t always mean better results. Using excessive PSI can strip paint or damage delicate materials, which I only realized after costly repairs. Another revelation was the importance of surface-specific techniques; what works on concrete can wreck vinyl siding. Lastly, I underestimated the value of proper nozzle selection—it’s not just about the spray but directing the power safely and effectively.
My Go-To Resources for Power Washing Success
I rely heavily on effective power washer equipment guides because they help me choose tools that match my projects without the risk of damage. The power washing tips for better results have taught me how to master technique, saving time and money. For maintenance routines, the battery care tips keep my gear running smoothly. These sources empower me to clean with confidence, ensuring durable results.
Ignite Your Passion for Safe Power Washing
Remember, every surface you tackle is an opportunity to negotiate with your equipment and technique. With knowledge and care, you can transform your power washing from a risky guess into a reliable skill. Take action now—your home’s beauty, safety, and longevity depend on it. Don’t let small mistakes turn into big problems; use what you’ve learned to elevate your game. Are you ready to approach your next project with newfound confidence and precision? Share your experiences below, and let’s grow together in this power washing journey!
Reading this brought back memories of my first brick cleaning attempt. I was so eager to get rid of the dirt that I cranked up the pressure without realizing it could damage the mortar. Thankfully, I caught it early, but it taught me a valuable lesson about surface-aware pressure settings. What struck me most is how crucial nozzle selection and maintaining a safe distance are—these small details can make or break the results. When it comes to delicate surfaces like brick, I’ve found that using wider spray angles and lower pressure helps prevent chips and mortar erosion. Has anyone here experienced similar mishaps, or perhaps found a trick that works especially well for bricks? It’d be great to hear how others approach sensitive surfaces with power washing. I think the key is patience and understanding your tools, rather than just relying on brute force.
This post really hits home for me as I learned the hard way about the importance of choosing the right nozzle and adjusting the pressure properly, especially when working with brick surfaces. It’s so easy to get caught up in the excitement of cleaning and forget that delicate materials like mortar require a much gentler approach. I’ve started using wider spray angles and low-pressure settings for bricks, which makes a significant difference in preventing damage while still getting the job done. One trick I swear by is testing on a small, inconspicuous area first—this way, you can dial in the perfect pressure and nozzle angle without risking the whole surface.
For anyone just starting out or struggling with uneven results, what’s your go-to method for ensuring consistent, safe cleaning on fragile surfaces? Does anyone have a favorite handheld style nozzle or technique that offers control without sacrificing efficiency? Would love to hear your tips or experiences to help others avoid costly mistakes.
This post really underscores how critical it is to use the right pressure and equipment for brick surfaces. I had a similar experience where I thought I was doing good by cranking up the PSI on my first attempt, only to find out I was damaging the mortar. Now, I take a more cautious approach, testing on small areas first and opting for wider nozzles. It’s amazing how much a slight adjustment in technique, like maintaining the right distance and using the correct nozzle, can make such a difference in protecting delicate surfaces. Has anyone here experimented with different nozzle angles or flow rates to find that perfect balance? I’d love to hear more tips on refining the process without risking damage, especially for those hard-to-reach areas or fragile materials. The key really is patience and a willingness to learn about your specific tools—those small details can save you a lot of money and headaches in the long run.